
170: OpenID With Authlogic
(view original Railscast)
Using OpenID authentication in Rails applications was covered in episode 68. This episode will show you how to combine OpenID with Authlogic which is substantially different from using OpenID on its own. If you’re new to Authlogic they you should read or watch episode 160 to see how it can be used to provide normal username and password authentication. In this episode we’ll extend the application we created in episode 160 so that a user can also log in using OpenID.
Setting Up
To use OpenID with Authlogic we’ll need the Authlogic OpenID and Ruby OpenID gems
and the OpenID Authentication plugin in our application. The first thing we’ll do is open our app’s /config/environment.rb file and add references to both gems.
config.gem "authlogic-oid", :lib => "authlogic_openid"
config.gem "ruby-openid", :lib => "openid"
Then we’ll run the command below to install the gems on our system.
sudo gem install ruby-openid authlogic-oid
And then this command to install the OpenID Authentication plugin from Github.
script/plugin install git://github.com/rails/open_id_authentication.git
The plugin comes with a rake task for generating a migration to create two database tables. We’ll need to run this task to create the migration
rake open_id_authentication:db:create
then migrate the database to create the new tables.
rake db:migrate
Updating Our Users Table
Our application has a users table which, as the name suggests, stores the user information. We’ll need to add a new column to this table to store each user’s OpenID URL so we’ll generate a migration to do so.
script/generate migration add_openid_identifier_to_users openid_identifier:string
The Authlogic OpenID gem expects the column to be called openid_identifier, so that’s what we’ll use. After generating the migration we’ll run
rake db:migrate
again to add the column to the table.
Adding OpenID Login To Our Forms
There are two places in our application where we’ll want to add the ability to log in with OpenID: the login page and the registration page. We’ll start with the registration form. The code currently looks like this:
<% form_for @user do |form| %>
<%= form.error_messages %>
<ol class="formList">
  <li>
    <%= form.label :username, "Username" %>
    <%= form.text_field :username %>
  </li>
  <li>
    <%= form.label :email, "Email" %>
    <%= form.text_field :email %>
  </li>
  <li>
    <%= form.label :password, "Password" %>
    <%= form.password_field :password %>
  </li>
  <li>
    <%= form.label :password_confirmation, "Password confirmation" %>
    <%= form.password_field :password_confirmation %>
  </li>
  <li>
    <%= form.submit "Submit" %>
  </li>
</ol>
<% end %>
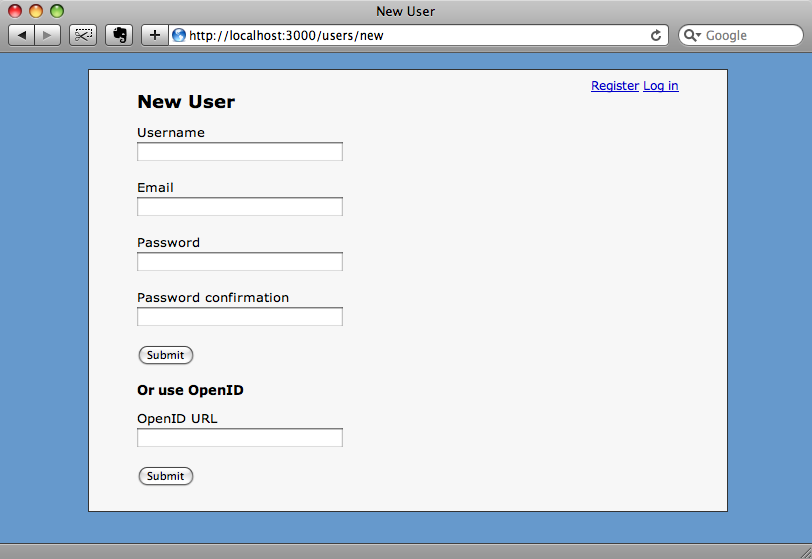
To add OpenID functionality we’ll add the following code just above the closing <% end %> in the form.
<h2>Or use OpenID</h2>
<ol class="formList">
  <li>
    <%= form.label :openid_identifier, "OpenID URL "%>
    <%= form.text_field :openid_identifier %>
  </li>
  <li>
    <%= form.submit "Submit" %>
  </li>
</ol>
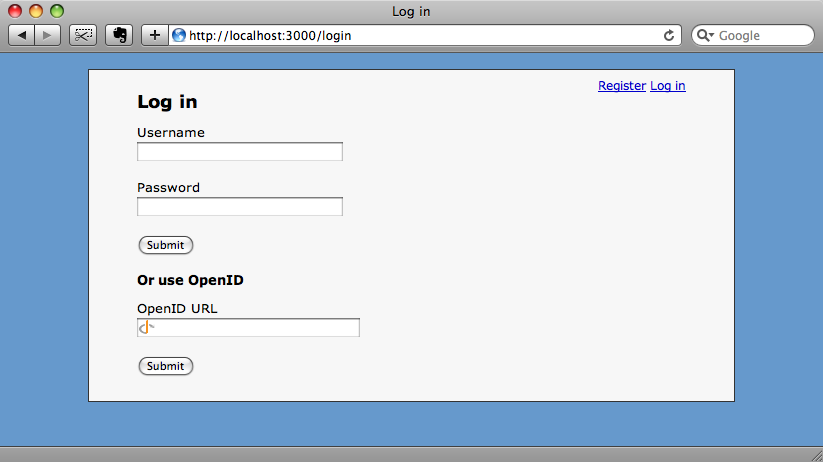
We’ll want the same functionality on the login page too, so can copy and paste the code into that form too.
<% form_for @user_session do |form| %>
<%= form.error_messages %>
<ol class="formList">
  <li>
    <%= form.label :username, "Username" %>
    <%= form.text_field :username %>
  </li>
  <li>
    <%= form.label :password, "Password" %>
    <%= form.password_field :password %>
  </li>
  <li>
    <%= form.submit "Submit" %>
  </li>
</ol>
<h2>Or use OpenID</h2>
<ol class="formList">
  <li>
    <%= form.label :openid_identifier, "OpenID URL "%>
    <%= form.text_field :openid_identifier %>
  </li>
  <li>
    <%= form.submit "Submit" %>
  </li>
</ol>
<% end %>
The OpenID login added to user_sessions/new.html/erb.
When user registers or logs in now they’ll see two ways to do so.
Changes To The Controllers
Having made the changes to our forms we can begin to modify the controllers so that users can register or log in with their OpenID identifiers. When a user logs in the create action of the UserSessionsController is called.
def create
  @user_session = UserSession.new(params[:user_session])
  if @user_session.save
    flash[:notice] = "Successfully logged in."
    redirect_to root_url
  else
    render :action => 'new'
  end
end
In order to make this method work with OpenID we’re going to have to make a change to the part of the code that saves the UserSession. Instead of calling the save method and using an if condition to see if the login was sucessful we’ll have to use a block.
def create
  @user_session = UserSession.new(params[:user_session])
  @user_session.save do |result|
    if result
      flash[:notice] = "Successfully logged in."
      redirect_to root_url
    else
      render :action => 'new'
    end
  end
end
The reason we need to use the block is that Authlogic handles the saving in a ‘magic’ way. The block won’t be executed immediately; instead the user will be redirected to their OpenID provider where they will authenticate before being redirected back. Only then will the code in the block be run and if result is true then the user is redirected to the home page.
We’ll have to do the same thing in the UsersController so that users can register via OpenID. We’ll modify the create method so that it too uses a block.
def create
  @user = User.new(params[:user])
  @user.save do |result|
    if result
      flash[:notice] = "Registration successful."
      redirect_to root_url
    else
      render :action => 'new'
    end
  end
end
Then modify the update method in a similar way.
def update
  @user = current_user
  @user.attributes = params[:user]
  @user.save do |result|
    if result
      flash[:notice] = "Successfully updated profile."
      redirect_to root_url
    else
      render :action => 'edit'
    end
  end
end
As we can’t use update_attributes with a block to update the user we’ll set the attributes with @user.attributes before calling save.
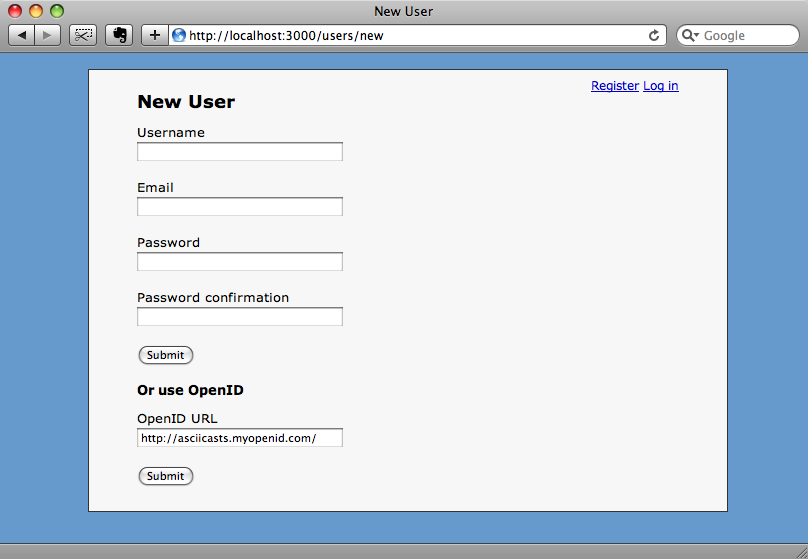
Trying To Register
We’ll try our new registration system out now. On the registration page we’ll log in with our OpenID URL.
When we click “Submit” we’ll be redirected to our OpenID provider’s page where we can authenticate ourselves.
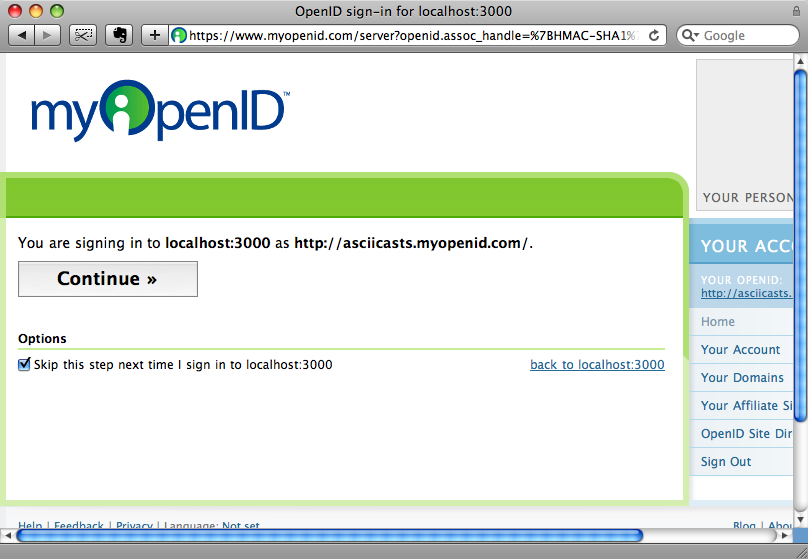
Once we’ve signed in on our OpenID provider’s site we’ll be redirected back to our site. Unfortunately we’re not quite there yet though.
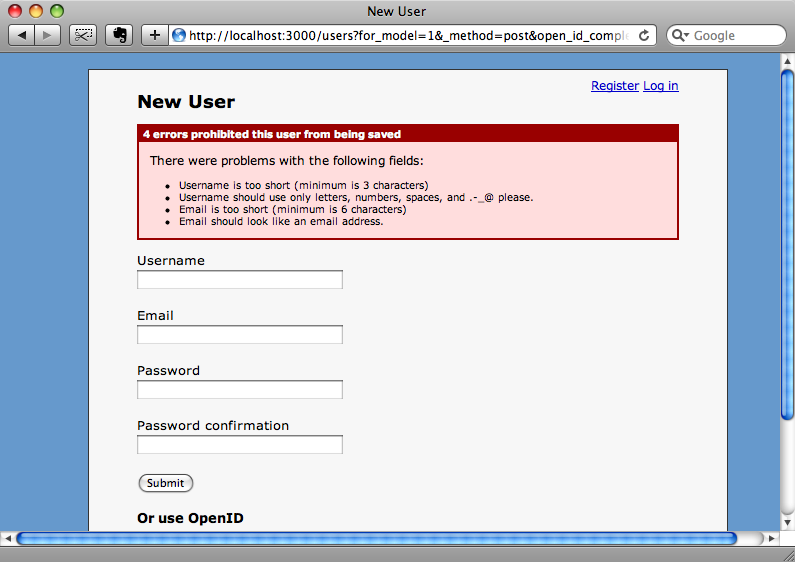
Although the registration seems to have worked the registration page is showing validation errors as we didn’t supply a username or password and these aren’t being fetched by our OpenID provider. There are a couple of ways we can solve this problem. One would to make the form more clear and it indicate that the OpenID URL is an alternative to providing a password and that a user name and email address are still required. The other would be to try to retrieve a username and password from the OpenID provider so that we can register the new user without them having to provide any more details other than their OpenID. We’ll take the latter approach so that if the OpenID provider doesn’t return either field we can prompt the user to enter them.
So, we want to configure Authlogic to request the OpenID email address and username from the provider as it authenticates the user. We can do this by passing a block to acts_as_authentic and calling methods on the block variable.
class User < ActiveRecord::Base
  acts_as_authentic do |c|
    c.openid_required_fields = [:nickname, :email]
  end
end
The method we need to call to return the fields we want is open_id_required_fields, which takes an array of the names of the fields. The username is known in OpenID terms as nickname and the email address is email.
There’s a little more we need to do. We’re requesting the fields from OpenID but we’re not mapping them to the attributes in our User model when the user is created. To do this in the User model we have to override a method that Authlogic provides, map_openid_registration.
private
def map_openid_registration(registration)
  self.email = registration["email"] if email.blank?
  self.username = registration["nickname"] if username.blank?
end
The method takes a hash, which contains the OpenID registration details. We’ll set the email address and username of our user from these details unless they’ve been set in the form.
It’s worth noting here that some OpenID providers will not supply these details unless a user has explicitly allowed it. For example MyOpenId lets you define a persona and set the fields that you want to be sent back to the requesting website when you log in.
Let’s try registering again and see how well our form works now.
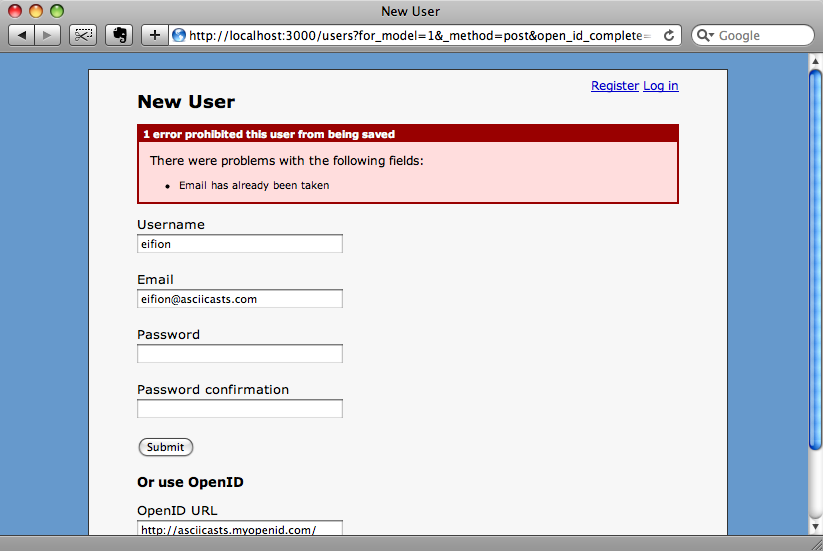
We’ve still not made it past the registration form, but we’re geting a different error message. The username and email fields are filled in with the data from the registration hash, but we’ve not successfully registered as the email address we’re using is already registered with the site.
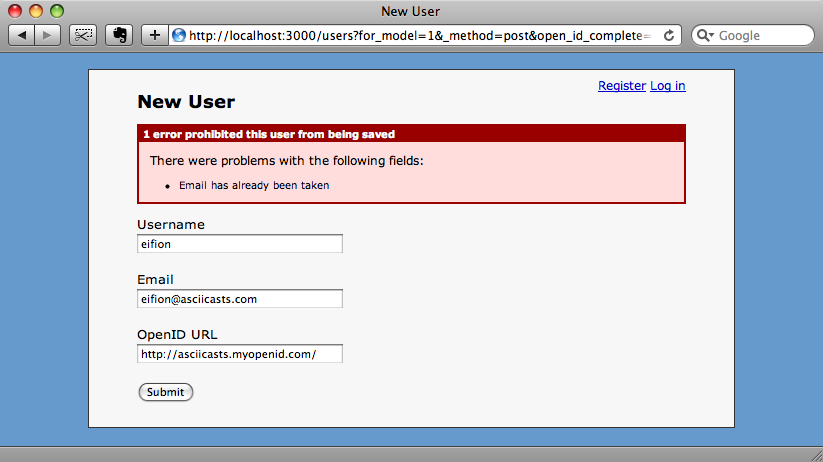
The last change we’ll make to the form is to hide the password fields when a user registers with OpenID. We can do this by modifying the registration form by wrapping the password fields, the first submit button and the “Or user OpenID” header in an if condition.
<% if @user.openid_identifier.blank? %>
  <!-- password fields -->
<% end %>
When we login with OpenID now and there are validation errors, the user will see a neater form.
If we fix the error by changing the email address we can finally register successfully and now we’ll be able to log in to the application with our OpenID address.
One Final Change
We’ll make one last change to our site and add the OpenID logo to the OpenID field in the registration and login forms. We can easily do this by adding some CSS.
input#user_openid_identifier, input#user_session_openid_identifier {
  background: url(http://openid.net/images/login-bg.gif) no-repeat;
  background-color: #FFF;
  color: #000;
  background-position: 0 50%;
  padding-left: 18px;
}
The OpenID field will now be more easy to identify on the forms.
That’s it! Now we can let the users of our site login or register in two different ways.