
248: Offline Apps Part 2
(view original Railscast)
Other translations:

In this episode we’ll conclude our short series on creating an offline web application. In the first part we used the rack-offline gem to create a cache manifest file. When we visit a site that has a manifest file the browser will download and cache the files listed in it along with any files that reference it, such as our application’s home page. This means that once we’ve visited our application while online we’ll be able to use it offline too.
Handling Offline Updates
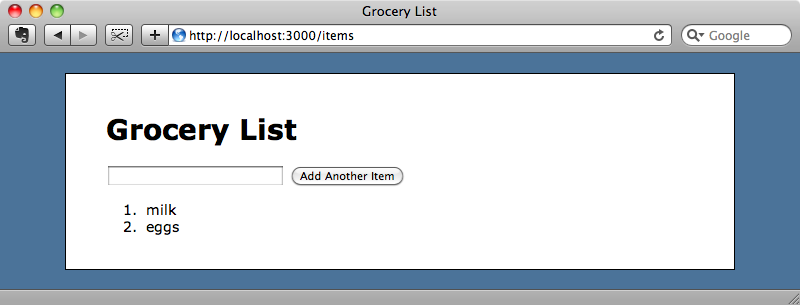
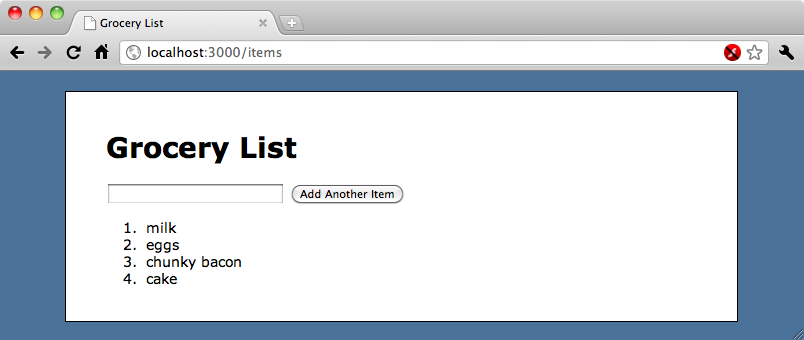
One of the main problems with offline applications is handling pages with dynamic content, such as the list of groceries in the page above. If we try to update the list by adding a new item while our application is in production mode the cache manifest won’t be updated and so the browser won’t know that the page has changed. When we add a new item it appears in the list, but this only works because adding an item makes a POST request to the server. If we refresh the page after adding the new item the browser displays the cached version of the page and the new item will disappear from the list. As the browser doesn’t know that the cache is now stale we can refresh the page as much as we like and it will have no effect.
One solution to this would be to update the cache every time the dynamic content changes. If we update the hash in the cache manifest it will force the browser to flush the cache. The problem with this approach is that it will cause the browser to download all of the cached files from the server and if we expect the dynamic content to change frequently then this isn’t very efficient. This approach also means that the application wouldn’t work offline. A better approach is to move the dynamic content out of the cache manifest.
We’re going to modify our application so that the list of items isn’t populated directly from the server. Instead the items page will be static and the list of items will be populated by making an AJAX call to the server once the static page as loaded. To do this we’ll be writing quite a lot of JavaScript and as we’re using jQuery the rest of this episode will be jQuery-specific.
There is an excellent plugin for jQuery called jQuery Templates that makes it easy to generate dynamic HTML from JSON objects and we’ll use that here to create the grocery list. We can copy the plugin’s JavaScript file to our application by running the following curl command from our application’s directory.
$ curl jquery/jquery-tmpl/raw/master/
  jquery.tmpl.js > public/javascripts/jquery.tmpl.js
Before we start applying this to the application we need to change our development configuration file. In the last episode we set config.cache_classes to true to simulate production mode. We’ll change it back to false so that we can work on developing our application.
/config/environments/development.rb
config.cache_classes = false
Using jQuery Template
The first step we need to make is to add a reference to the jQuery Templates file in our application’s layout file.
/app/views/layouts/application.html.erb
<%= javascript_include_tag :defaults, "jquery.tmpl" %>
If we look at our items index page we can see the erb code that generates the list of items.
/app/views/items/index.html.erb
<ol id="items" >
  <% @items.each do |item| %>
  <li><%= item.name %></li>
  <% end %>
</ol>
We need to populate this content through JavaScript on the client instead of with erb on the server so we’ll write a jQuery Template to do this.
We’ll place the template within a <script> element with a type of text/html and give it an id so that we can identify it with JavaScript. Instead of using erb to determine where the dynamic content goes we use the jQuery Template’s scripting language and place the content within ${}, in this case we’ll be displaying each item’s name just as we did in the erb code.
/app/views/items/index.html.erb
<script type="text/html" id="item_template">
  <li>${item.name}</li>
</script>
<ol id="items">
</ol>
Note that we keep the empty <ol> element where it is so that we can add the dynamic content to it later. In our application.js file we can now populate that list of items using jQuery Template. Before we fill it with real data we’ll try it out with a hard-coded test item.
/public/javascripts/application.js
$(function () {
  $(window.applicationCache).bind('error', function () {
    alert('There was an error when loading the cache manifest.');
  });
  $("#items").html($("#item_template").tmpl({"item":{"name":"cake"}}));
});
In the code above we get the <ol> element by its id then call the jQuery function html on it to replace its contents. That content comes from the template and so we get the template by its id, item_template, and call tmpl on it. The tmpl function takes either a JavaScript object or an array of objects as an argument and in this case we pass it a literal object with a name property.
If we reload the page a couple of times now we’ll see the item listed, generated by jQuery Template.

Of course we want the items in the list to show the items from the database too and we’ll get them by making an AJAX request to the server that returns the items from the database as JSON.
/public/javascripts/application.js
$(function () {
  $(window.applicationCache).bind('error', function () {
    alert('There was an error when loading the cache manifest.');
  });
  $.getJSON("/items.json", function(data) {
    $("#items").html($("#item_template").tmpl(data));
  });
});
We’ll have to modify our ItemsController’s index action so that it can return JSON and we can make use of Rails 3’s respond_to method to do that.
/app/controllers/items_controller.rb
class ItemsController < ApplicationController
  respond_to :html, :json
  def index
    @items = Item.all
    respond_with(@items)
  end
  def create
    @item = Item.new(params[:item])
    @item.save
    redirect_to items_path
  end
end
When we call /items.json now the server will return a list of items in JSON.
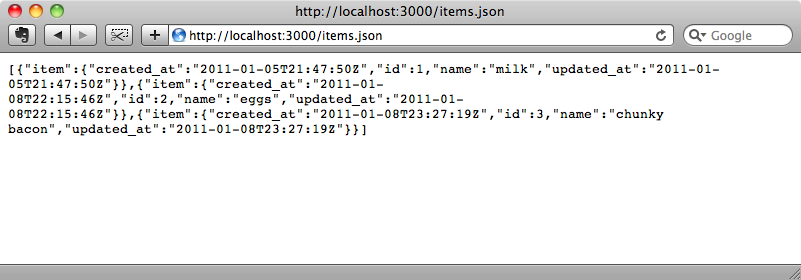
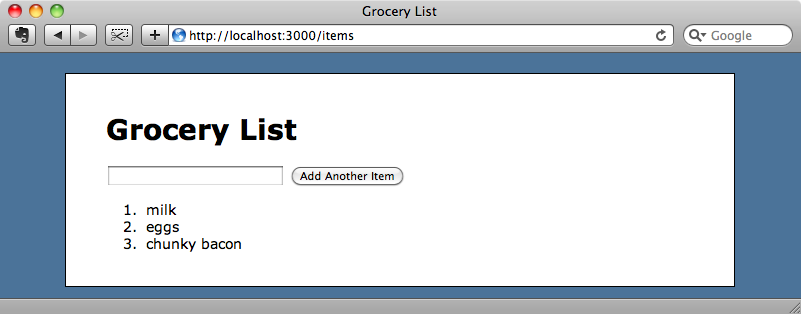
This page is not listed in the cache manifest so it won’t be cached. Therefore we don’t need to worry about the results not being updated. If we visit the items page now we’ll see the list of items from the items table in the database, populated from the data from the JSON request.
Storing Items Locally
The next step is to get our application working offline. What happens if we turn off the Rails server and reload the page?

The items aren’t listed now as the browser cannot fetch them from the server. To fix this we can bring another jQuery plugin into use: jQuery-Offline. This plugin stores the JSON data by using the browser’s localStorage so that it will be available offline. To use it we just need to copy the two files from the plugin’s lib directory, jquery.offline.js and json.js, into our application’s /public/javascripts directory. We can do that by running two curl commands.
$ curl wycats/jquery-offline/raw/master/lib
  jquery.offline.js > public/javascripts/jquery.offline.js
$ curl wycats/jquery-offline/raw/master/lib/
  json.js > public/javascripts/json.js
Next we’ll need to include these files in the application’s layout file.
/app/views/layouts/application.html.erb
<%= javascript_include_tag :defaults, "jquery.tmpl", "json",
  "jquery.offline" %>
In the application.js file we can now replace getJSON with retrieveJSON. The retrieveJSON function acts much like getJSON does but also stores the retrieved JSON in the browser’s localStorage.
/public/javascripts/application.js
$(function () {
  $(window.applicationCache).bind('error', function () {
    alert('There was an error when loading the cache manifest.');
  });
  $.retrieveJSON("/items.json", function(data) {
    $("#items").html($("#item_template").tmpl(data));
  });
});
If we start up the server now and visit the items page we’ll see the list of items again. If we then stop the server and reload the page the items will still be listed as they’re stored in the localStorage and retrieveJSON will try to retrieve items from there if there’s no online connection.
Adding Items While Offline
Our application can now list its items even when there is no Internet connection but we can’t add items while offline. If we try to the browser will make a normal POST request to the server which will of course fail. We’ll make some changes so that if an item is added while the application is offline the item will be shown on the page and stored in a list of pending items. When the application comes back online it will submit the pending items to the server so they can be stored in the database.
Unfortunately jQuery Offline mainly works with fetching items from the server and not with submitting items. We’ll have to do this in a more manual way, which means that we’re going to have to write more JavaScript than we would if there was a plugin available.
We’ll need to store the pending items in the browser so we’ll create a new object in the localStorage store called pendingItems. When we render the list of items we want to see both the items that originally came from the server and the pending items and so we’ll concatenate the pending items to the items that originally came from the server in the retrieveJSON call.
/public/javascripts/application.js
$(function () {
  $(window.applicationCache).bind('error', function () {
    alert('There was an error when loading the cache manifest.');
  });
  if (!localStorage["pendingItems"]) {
    localStorage["pendingItems"] = JSON.stringify([]);
  }
  $.retrieveJSON("/items.json", function(data) {
    var pendingItems = $.parseJSON(localStorage["pendingItems"]);
    $("#items").html($("#item_template").tmpl(data.concat(pendingItems)));
  });
});
When someone submits the form to add a new item we want to capture that event in JavaScript and add the new item to the pending items list. The code to do this will go immediately after the $.retrieveJSON function above.
/public/javascripts/application.js
$('#new_item').submit(function (e) {
  var pendingItems = $.parseJSON(localStorage["pendingItems"]);
  var item = {"data":$(this).serialize(), "item":{"name":$("#item_name").val()}};
  $("#item_template").tmpl(item).appendTo("#items");
  pendingItems.push(item);
  localStorage["pendingItems"] = JSON.stringify(pendingItems);
  $("#item_name").val("");
  e.preventDefault();
});
The code above traps the form’s submit event. When the form is submitted the function that is called first gets the list of pending items from the localStorage. It then creates a new item. This item will have two attributes: the first, data, is the serialized form data. This will allow us to submit the item to the server later on. The second is item and this has its own name attribute, much like the items we get from the call to /items.json. That means that we can then use this new item to populate our template and add it to the list of items.
We do this in the third line in the function where we fetch the template, call tmpl on it, passing in the new item, and append the result to the list of items. We then add the new item to the list, put the updated list back into the localStorage and then clear the form’s text box. Finally we call preventDefault to prevent the form from being submitted back to the server.
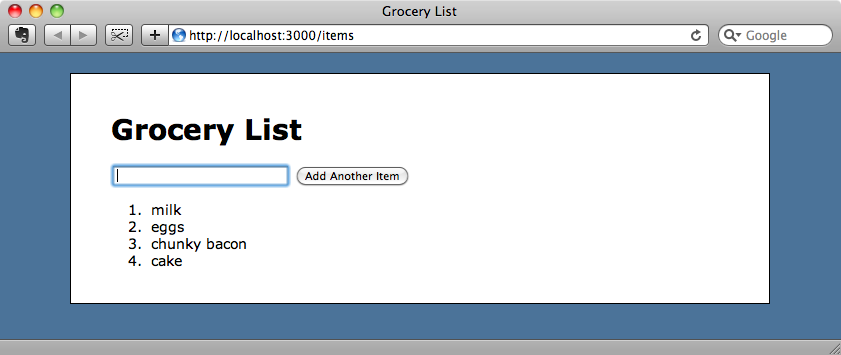
Let’s see if it works. We have the server running and we’ll reload the page a couple of times to make sure that we get the latest version. When we enter a new item in the textbox, for example “cake”, and press the button the item is added to the list immediately and is also added to the list of pending items.
Saving Pending Items Back To The Server
The items we add this way will only be stored on the browser they are added on so if we look at the page in another browser we’ll only see three items. We’ll need to submit a POST request for each pending item whenever our application comes back online. We’ll add the following code to application.js to do this.
/public/javascripts/application.js
$(function () {
   // Other functions omitted.
   function sendPending() {
    if (window.navigator.onLine) {
      var pendingItems = $.parseJSON(localStorage["pendingItems"]);
      if (pendingItems.length > 0) {
        var item = pendingItems[0];
        $.post("/items", item.data, function (data) {
          var pendingItems = $.parseJSON(localStorage["pendingItems"]);
          pendingItems.shift();
          localStorage["pendingItems"] = JSON.stringify(pendingItems);
          setTimeout(sendPending, 100);
        });
      }
    }
  }
  sendPending();
});
The sendPending function first checks to see if the browser is online using navigator.onLine. It then fetches the pending items out of localStorage and checks to see how many items there are. If there are any it fetches the first and then submits a POST request to /items, passing in the serialized form data that we stored when we entered the item in the form. When the response returns we get the pending items again, in case any more have been added in the meantime, remove the first item and then put the list back into localStorage. We then wait for a tenth of a second before calling the function again so that the next item in the list can be POSTed back to the server. We call sendPending as soon as the page loads so that the page can try to send any pending items then.
With our application online we can now refresh the page a couple of times to make sure that the updated JavaScript is loaded. If we then open another browser we’ll see the item that we added while offline now listed.
Some Final Tweaks
Our application is now working as we want it to but there are a couple of changes we can to make to the JavaScript file to improve it. The first is to call sendPending as soon as an item is added to the pending items so that we can attempt to send it to the server straightaway.
/public/javascripts/application.js
$('#new_item').submit(function (e) {
    var pendingItems = $.parseJSON(localStorage["pendingItems"]);
    var item = {"data":$(this).serialize(),  "item":{"name":$("#item_name").val()}};
    $("#item_template").tmpl(item).appendTo("#items");
    pendingItems.push(item);
    localStorage["pendingItems"] = JSON.stringify(pendingItems);
    $("#item_name").val("");
    sendPending();
    e.preventDefault();
  });
Another change we can make it to bind the sendPending function to the online event. If you’re on a mobile device and moving around then your device may well be constantly going online and offline. When it comes online this event will be triggered so by binding sendPending to it the browser can attempt to send any pending messages as soon as the device comes back online.
/public/javascripts/application.js
$(window).bind("online", sendPending);
We’ll also change the alert message that shows whenever there’s an error with the applicationCache so that it displays in the console instead.
/public/javascripts/application.js
$(window.applicationCache).bind('error', function () {
  console.log('There was an error when loading the cache manifest.');
});
Finally we’ll make one more change to the JavaScript file. Not all browsers support localStorage so we’ll wrap the code in an if statement and show a message that tells the user to upgrade their browser if theirs doesn’t.
/public/javascripts/application.js
$(function () {
  if ($.support.localStorage)
  {
	// Other code omitted.
  }
  else {
    alert("Time to upgrade your browser.")
  }
});
Back in the items list template file we’ll add a default item in the list that says that the items are loading so that if the browser is a little slow the user at least sees something.
/app/views/items/index.html.erb
<% title "Grocery List" %>
<%= form_for Item.new do |f| %>
 <%= f.text_field :name %>
 <%= f.submit "Add Another Item" %>
<% end %>
<script type="text/html" id="item_template">
  <li>${item.name}</li>
</script>
<ol id="items">
  <li><em>Loading items...</em></li>
</ol>
That’s it for this episode. It was mostly JavaScript-based which is unusual, but the ability to create applications that can work offline is fairly awesome. If you have an iPhone or other mobile device then you can test this application out by calling its IP address in your browser and then putting your phone in Airplane mode and trying it out offline.