21: Super Simple Authentication
(view original Railscast)
In the previous episode we showed you how to show or hide administration links depending on whether the current user is an admin. We did this by writing a boolean method called admin? in our ApplicationController. If admin? returned true then the links were shown, otherwise they were hidden. We left the method just returning true; what we need to do is finish writing that method and provide a way for admin users to log on to the site.
There’s More Than One Way To Do It
There are many different ways to implement the login system. We could implement an entire user registration system with a User model, a registration page and so on. If we were to take this approach there is an excellent plugin called restful_authentication, which is an updated version of acts_as_authenticated, available for download.1 Once installed, the User model and a controller called Sessions can be generated like this.
$script/plugin install git://github.com/technoweenie/restful-authentication.git restful_authentication
$script/generate authenticated User sessions
$rake db:migrate
We won’t be using Restful Authentication here. The restful_authentication plugin will be discussed in more detail in episode 67.
Our website is so simple that a whole user administration system is not needed. We only need to administer the episodes on the site, so we’ll go for a more straightforward approach that doesn’t need a User model or any plugins. If we wanted to take a really basic approach we could restrict access by IP address and write our admin? method like this.
def admin
  request.remote_ip == "127.0.0.1"
end
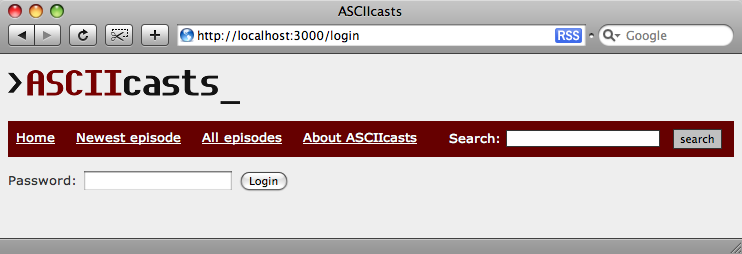
This is rather limiting as it assumes that your Internet connection has a static IP address and that you’re always going to want to administer your website from the same location. Instead of that we’ll build a simple login page that just takes a password. If the password is entered correctly then the user will see the admin links.

Our basic login page.
To do this we’ll generate a Sessions controller. The controller’s code is below.
class SessionsController < ApplicationController
  def new
  end
  def create
    session[:password] = params[:password]
    flash[:notice] = ’Successfully logged in’
    redirect_to home_path
  end
  def destroy
    reset_session
    flash[:notice] = ’Successfully logged out’
    redirect_to login_path
  end
end
There is also a basic new view in the /views/sessions folder.
<% form_tag sessions_path do %>
  Password: <%= password_field_tag :password %>
  <%= submit_tag "Login" %>
<% end %>
The form is submitted to the create action which stores the entered password in the session then redirects to the home page. In our admin? method we check the password in the session against the correct password and return true if they match.
def admin?
  session[:password] == "secret"
end
Done!
Our basic login page is now complete. While not as sophisticated as a full user management system like that provided by Restful Authentication, it is good enough to serve for our simple site.
Finally, in case you are wondering how we gave the login page the url /login, it’s done by adding these two routes to routes.rb
  map.connect ’login’, :controller => ’sessions’, :action => ’create’
  map.connect ’logout’, :controller => ’sessions’, :action => ’destroy’


