
268: SASS Basics
(view original Railscast)
Other translations:


One of the big changes in the upcoming Rails 3.1 release is SASS support which is provided by default as a way of generating CSS. SASS provides a number of features to make managing an application’s stylesheets easier including nesting, variables and many other features that don’t come as standard with CSS. In this episode we’ll convert the CSS in a Rails application to SASS to demonstrate its advantages.
The site we’ll be working with looks like this:
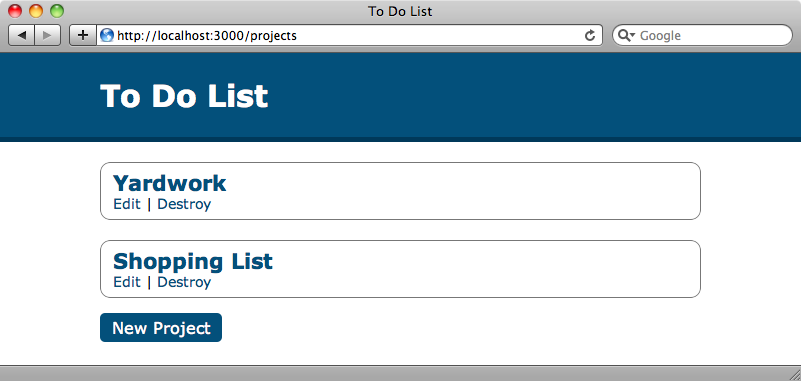
All of the styling is done with plain CSS and our aim is to have the site look exactly the same once we’ve converted it to SASS. Here’s the stylesheet we’ll be altering:
/app/assets/stylesheets/layout.css
body {
  margin: 0;
  padding: 0;
  background-color: #FFF;
  font-family: verdana;
  font-size: 14px;
}
#header {
  background-color: #03507B;
  color: #FFF;
  padding: 4px 100px;
  border-bottom: solid 5px #00395A;
}
#header h1 {
  font-size: 30px;
}
a {
  color: #03507B;
  text-decoration: none;
}
a:hover {
  text-decoration: underline;
}
.new_project {
  background-color: #03507B;
  color: #FFF;
  padding: 5px 12px;
  margin: 10px 0;
  font-size: 16px;
  border-radius: 5px;
  -moz-border-radius: 5px;
  -webkit-border-radius: 5px;
}
#container {
  margin: 0 100px;
}
.project {
  border: solid 1px #777;
  margin: 20px 0;
  padding: 7px 12px;
  border-radius: 10px;
  -moz-border-radius: 10px;
  -webkit-border-radius: 10px;
}
.project h2 {
  margin: 0;
}
There’s nothing complicated here so it should be fairly straightforward to convert this code to SASS. The first step is to add a .scss extension to the file name. Normal CSS code is fully-compliant with SASS if the file has an .scss extension so if we reload the page in the browser now it should look exactly the same.
So, that’s it, our site is using SASS. Is that all we need to do? Well, no, but it’s great that CSS is fully supported as it means that we can pick and choose the SASS features we want to use. If we have a site with a number of existing CSS files we could rename those files and start modifying them to introduce SASS features as and when we wanted. Given the features we’re about to show you you’ll probably want to start using them straightaway.
Nesting
The first SASS feature we’ll use in our stylesheet is nesting. Take a look at the following CSS snippet:
/app/assets/stylesheets/layout.css.sass
#header {
  background-color: #03507B;
  color: #FFF;
  padding: 4px 100px;
  border-bottom: solid 5px #00395A;
}
#header h1 {
  font-size: 30px;
}
This code defines styles for an element with an id of header and for any h1 elements within that header element. In SASS we can nest the h1 styles within the #header styles like this:
/app/assets/stylesheets/layout.css.sass
#header {
  background-color: #03507B;
  color: #FFF;
  padding: 4px 100px;
  border-bottom: solid 5px #00395A;
	h1 {
		font-size: 30px;
	}
}
This means that we don’t have to specify a prefix for nested elements and encourages us to keep nested elements together. It can be easy to get carried away with this feature and to introduce long, complex nested into your SASS code so it’s better to keep the nesting simple. That way we can tell at a glance what’s nested under what. This isn’t a hard-and-fast rule, however, and you can experiment in your own stylesheets to find the level of nesting that suits you best.
We can also use self-referencing nesting in our stylesheets. In the CSS code we have a selector for a and one for a:hover.
/app/assets/stylesheets/layout.css.sass
a {
  color: #03507B;
  text-decoration: none;
}
a:hover {
  text-decoration: underline;
}
We can nest these too but as a:hover isn’t a true nested element we need to add an ampersand to represent the parent element.
/app/assets/stylesheets/layout.css.sass
a {
  color: #03507B;
  text-decoration: none;
  &:hover {
   text-decoration: underline;
  }
}
The ampersand is necessary as we’re applying styles to an attribute on an element rather than to a true nested element.
Variables
Another useful feature that SASS provides is the ability to define variables. In our CSS file we use the same colour in a number of places. If we wanted to change that colour across the site we’d need to make a number of changes to the CSS file.
SASS makes this easier by allowing us to by define variables. SASS variable names start with a dollar sign so we can define a variable for our colour like this:
$main-color: #03507B;
We can now replace any reference to that colour with the variable:
/app/assets/stylesheets/layout.css.sass
$main-color: #03507B;
#header {
  background-color: $main-color;
  color: #FFF;
  padding: 4px 100px;
  border-bottom: solid 5px #00395A;
	h1 {
		font-size: 30px;
	}
}
a {
  color: $main-color;
  text-decoration: none;
  &:hover {
   text-decoration: underline;
  }
}
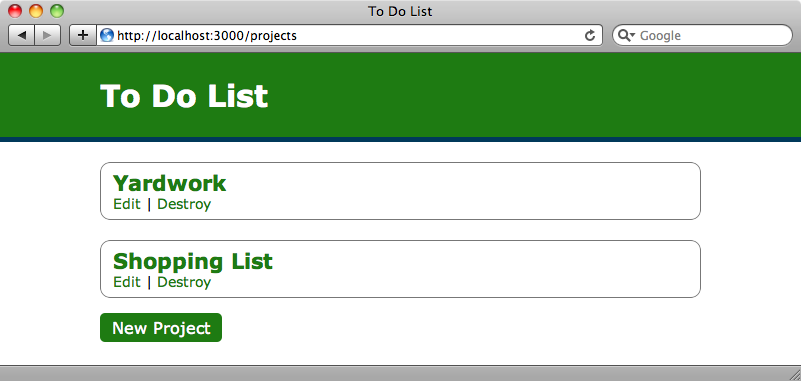
If we reload our page again it still looks the same so we haven’t broken anything. When we want to change the colour we only need to do so in one place and we can change the blue to a green by changing just one line in the stylesheet.
/app/assets/stylesheets/layout.css.sass
$main-color: #1E7B12;
When we reload the page now all of the styles that use that colour have changed: the background header, the links and the “New Project” button are all now green and we’ve only had to make one change to our stylesheet to do this.
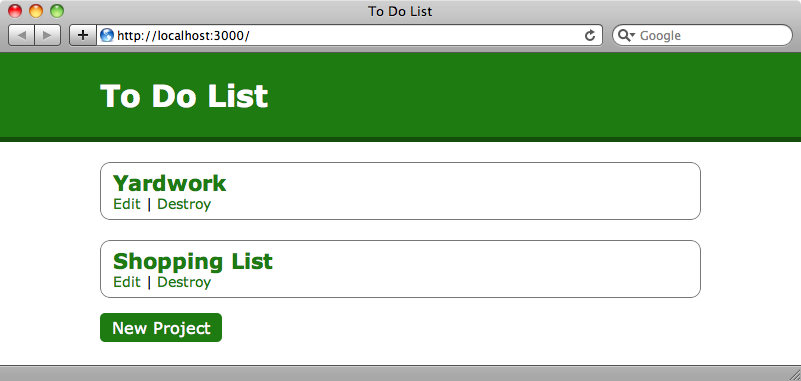
The border at the bottom of the header is still dark blue but we want it to be a darker shade of the header colour. SASS allows us to define relative colours by making use of functions. A full list of functions is available on the SASS website this includes a darken function that will do exactly what we want. If we pass it a colour and a percentage it will return a colour darkened by that amount.
The header’s bottom border colour is defined in the #header declaration.
/app/assets/stylesheets/layout.css.sass
#header {
  background-color: $main-color;
  color: #FFF;
  padding: 4px 100px;
  border-bottom: solid 5px #00395A;
	h1 {
		font-size: 30px;
	}
}
We can replace the dark blue colour there with a call to darken so that the border is the same colour as the header’s background colour but 10% darker.
/app/assets/stylesheets/layout.css.sass
#header {
  background-color: $main-color;
  color: #FFF;
  padding: 4px 100px;
  border-bottom: solid 5px darken($main-color, 10%);
	h1 {
		font-size: 30px;
	}
}
When we reload the page again the blue border changes to a darker green.
Mix-ins
Mix-ins are another SASS feature that can help us to reduce duplication. On our stylesheet are two elements that have a border radius. Border radius definitions are more complicated than they should be as we need to specify vendor-specific CSS declarations to ensure that the radius works across all browsers.
border-radius: 5px;
-moz-border-radius: 5px;
-webkit-border-radius: 5px;
If we move this code out into a mix-in it will make adding border radius declarations to our code much easier. We define a mix-in with the @mixin keyword and give it a name so that we can use it elsewhere.
/app/assets/stylesheets/layout.css.sass
@mixin rounded-corners {
  border-radius: 5px;
  -moz-border-radius: 5px;
  -webkit-border-radius: 5px;
}
We can apply a border radius anywhere we want to now by calling @include.
/app/assets/stylesheets/layout.css.sass
.new_project {
  background-color: $main-color;
  color: #FFF;
  padding: 5px 12px;
  margin: 10px 0;
  font-size: 16px;
  @include rounded-corners;
}
We have another border-radius declaration in our stylesheet that has a different value for the radius. Fortunately we can pass arguments to mix-ins so we’ll alter our rounded-corners mix-in to look like this:
/app/assets/stylesheets/layout.css.sass
@mixin rounded-corners($radius) {
  border-radius: $radius;
  -moz-border-radius: $radius;
  -webkit-border-radius: $radius;
}
We can now pass in any value we want wherever we want an element with a border radius.
/app/assets/stylesheets/layout.css.sass
.project {
  border: solid 1px #777;
  margin: 20px 0;
  padding: 7px 12px;
  @include rounded-corners(10px);
}
If we want to specify a default value for the argument we can do so like this, though we don’t do so for our stylesheet.
/app/assets/stylesheets/layout.css.sass
@mixin rounded-corners($radius: 5px) {
  border-radius: $radius;
  -moz-border-radius: $radius;
  -webkit-border-radius: $radius;
}
Using SASS Across Multiple Files
Even when using SASS stylesheets can become long and unwieldy so lets look at how we can organise the styles and put them into separate files. We already have a projects.css.scss file in our application which was created when we generated the Projects scaffold. There’s nothing in this file by default except a comment, but we can put SASS code in this file and it will be included in the code that’s compiled into a single application.css file by Rails 3.1.
We want to move any SASS related to projects into the projects.css.scss file. Let’s do that and see what happens.
/app/assets/stylesheets/projects.css.scss
.new_project {
  background-color: $main-color;
  color: #FFF;
  padding: 5px 12px;
  margin: 10px 0;
  font-size: 16px;
  @include rounded-corners(5px);
}
.project {
  border: solid 1px #777;
  margin: 20px 0;
  padding: 7px 12px;
  @include rounded-corners(10px);
}
.project h2 {
  margin: 0;
}
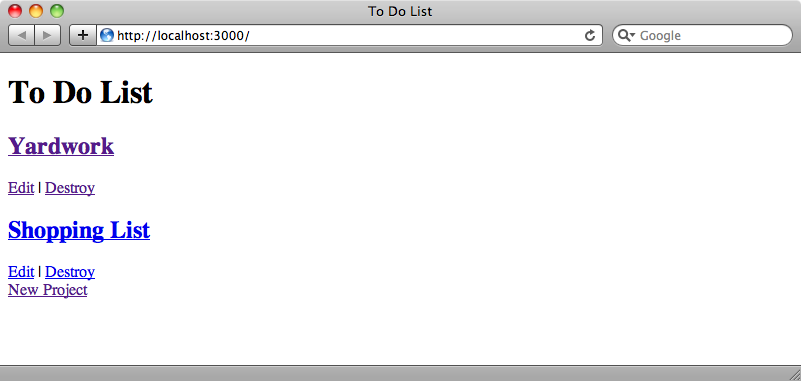
When we reload the page now we’ll see that none of the styles are applied.
We can check to see if a SASS error has been thrown by either looking in the log file or by visiting the stylesheet in the browser.
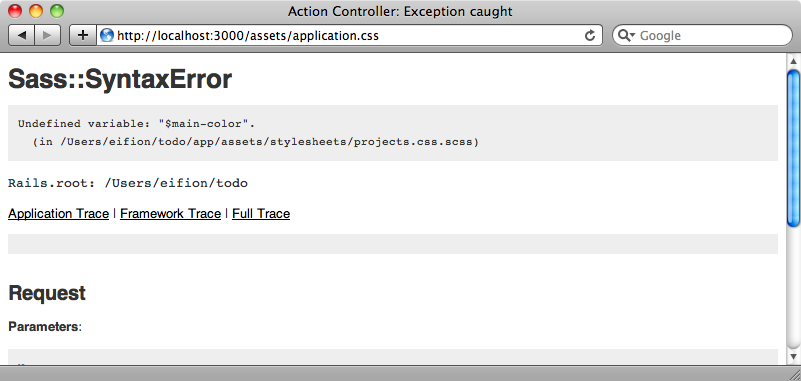
We can see here that there’s a syntax error in our SASS code that’s stopping the stylesheet from being generated. In this case we have an error about an undefined variable:
Undefined variable: "$main-color".
It looks like the variable that we’re defining in our main stylesheet isn’t passed between multiple SASS files.
This error is caused by the way that Sprockets work in Rails 3.1. Variables aren’t shared between SASS files and we can see why in our application.css file.
/app/assets/stylesheets/application.css
/*
 * This is a manifest file that'll automatically include all the stylesheets available in this directory
 * and any sub-directories. You're free to add application-wide styles to this file and they'll appear at
 * the top of the compiled file, but it's generally better to create a new file per style scope.
 *= require_self
 *= require_tree .
*/
The line require_tree . tells Sprockets to include every file inside the stylesheets directory. The problem is that every SASS file is compiled separately into a CSS file before the files are combined so variables aren’t shared between files. To get this working we need to remove require_tree . and instead use SASS to import each stylesheet. An advantage of this approach is that it allows us to define the order in which the files are loaded. When we use require_tree we can’t determine the order in which the files will be loaded. To do this we need to rename the application.css file to application.css.scss. We can then remove the require_tree line and import our stylesheets instead.
/app/assets/stylesheets/application.css.scss
/*
 * This is a manifest file that'll automatically include all the stylesheets available in this directory
 * and any sub-directories. You're free to add application-wide styles to this file and they'll appear at
 * the top of the compiled file, but it's generally better to create a new file per style scope.
 *= require_self
*/
@import "layout.css.scss";
@import "projects.css.scss";
This will preserve all of our variables, mix-ins and anything else we set between stylesheets and when we reload our stylesheet now it loads correctly and the variables defined in the layout stylesheet are available to the projects stylesheet.
SCSS vs SASS
You might be wondering why the stylesheets have an extension of .scss when the language is called SASS. This is because SASS supports two different syntaxes. SCSS is new to SASS 3 but the old syntax is still available and will continue to be supported. To use it we use a stylesheet with a .sass file extension. SASS syntax is similar to that of SCSS but it doesn’t use curly braces or semicolons at the end of each line instead using significant white-space to define the block level. The SCSS syntax, being a superset of CSS, is easier to deal with if you’re migrating existing stylesheets to SASS but the choice is entirely yours.
Conditional Stylesheets
We’ll finish this episode with a quick tip. How can we change the CSS files that are included based on the current controller? Given that we have a stylesheet called projects.css.scss we might think that it would only be included in the ProjectsController’s actions, but this is not the case. All of the CSS is compiled into a single stylesheet which is applied to every page in the application. Normally this isn’t a problem if we scope everything correctly but at times it can cause problems.
One solution to this is to modify the opening body tag in the layout file and to add an id attribute that has the name of the current controller as its value.
/app/views/layouts/application.html.erb
<body id="<%= params[:controller].parameterize %>_controller">
We’ve called parameterize on the controller name to remove any invalid characters from the name. We now have a unique id for each controller that we can scope to in our SASS files like this:
/app/assets/stylesheets/projects.css.scss
#projects_controller
{
  .new_project {
    background-color: $main-color;
    color: #FFF;
    padding: 5px 12px;
    margin: 10px 0;
    font-size: 16px;
    @include rounded-corners(5px);
  }
  .project {
    border: solid 1px #777;
    margin: 20px 0;
    padding: 7px 12px;
    @include rounded-corners(10px);
  }
  .project h2 {
    margin: 0;
  }
}
Styles defined in this stylesheet will now only be applied to the ProjectsController’s actions. This means that we have less chance of conflicts between similar ids or class names across controllers.
That’s it for this episode on SASS. We’ve not covered everything that SASS can do in this episode so be sure to take a look at the documentation on the SASS website for further information.