409: Active Model Serializers
(view original Railscast)
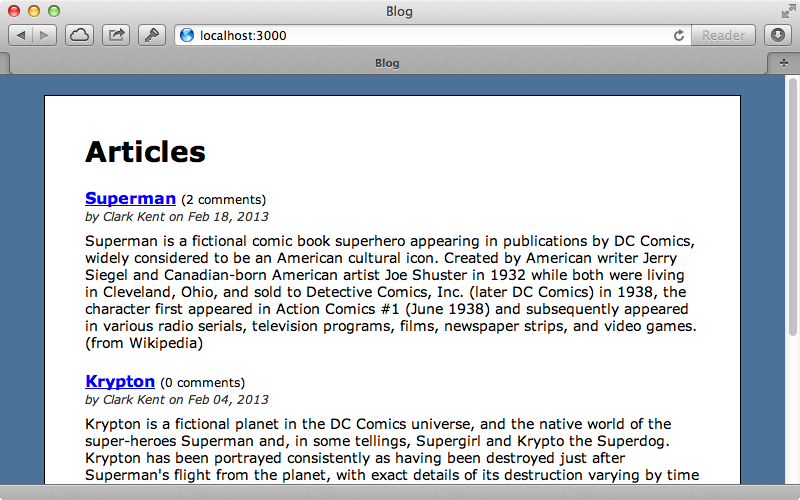
In this episode we’ll look at Active Model Serializers which be used to generate a JSON API in Rails. Below is a screenshot from a fairly standard blogging application with multiple articles, each of which can have many comments. We want to provide a JSON API to go alongside the HTML view so that if we append a .json to the URL we’ll get the article’s data.
If we try this now we’ll see an exception as our application doesn’t know how to respond to JSON requests. This is easy to fix: in our ArticlesController we can add a respond_to block to the show action so that we can see the JSON representation of an article.
/app/controllers/articles_controller.rb
def show
  @article = Article.find(params[:id])
  respond_to do |format|
    format.html
    format.json { render json: @article }
  end
end
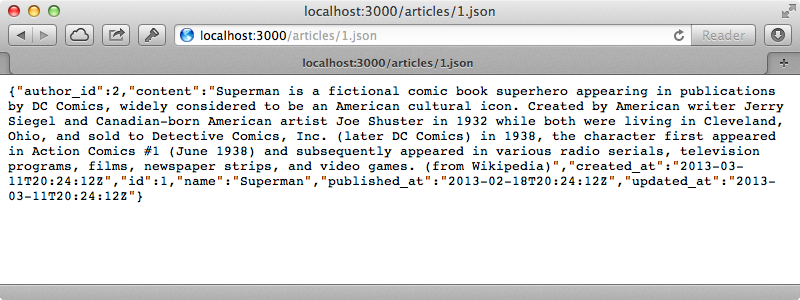
When we load the page for an article now we’ll see its data as JSON.
Customizing The Output
This is a fairly common way to generate a JSON API in Rails but we often need to further customize the output. We can do this by either passing options in through the controller or by overriding the as_json method in the model but both of these approaches can get messy fairly quickly. This is where tools like the Active Model Serializer gem come in handy so we’ll add it to our application. We use it in the usual way by adding to the gemfile and running bundle to install it.
/Gemfile
gem 'active_model_serializers'
This gem provides a generator which we need to run for each model that we want to present through the API. If we were using the resource generator in Rails it would make this automatically. We’ll use this to make a serializer for our articles.
$ rails g serializer article
This generator creates a single file in a new app/serializers directory. This means that we now have a dedicated class that we can use to fully customize the JSON output and usefully this gem includes hooks so that when we try to render out a model in a JSON format it will automatically look for a serializer with the same name and if it finds it, use it to fetch the JSON data. In this class we can specify the attributes that we want to include in the output.
/app/serializers/article_serializer.rb
class ArticleSerializer < ActiveModel::Serializer
  attributes :id, :name, :content
end
If we reload the page now we’ll see the JSON for the article rendered out through the serializer class.
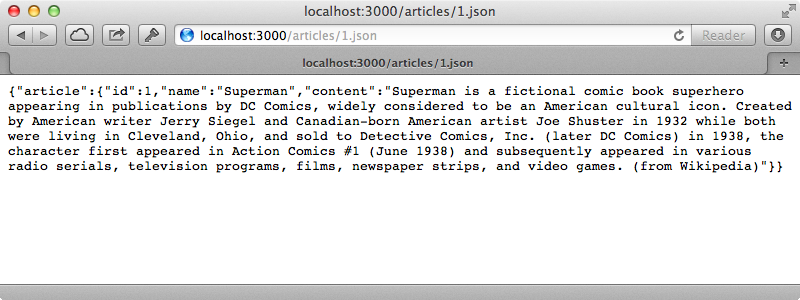
There’s one key difference here: all the attributes are now included in a root node called article and this is different to how Rails generates JSON by default. We might not want this behaviour, depending on how we want our API to be consumed, and we can disable the root node by passing in the root option in our controller acton and setting it to false.
/app/controllers/articles_controller.rb
format.json { render json: @article, root: false }
If we want all our serialized objects to behave this way we can define a default_serializer_options method and set our default options there.
/app/controllers/articles_controller.rb
def default_serializer_options
  {root: false}
end
The Active Model Serializer will automatically pick this up and if we move this up into the ApplicationController it’s included in all the controllers. We want to keep the route node, so we won’t add this method to our app. Instead, we’ll go back to our serializer class to see how we can further customize the output. Let’s say that we want to add attributes that aren’t methods defined on the model, such as the article’s URL. We can define a method in the serializer and it will use this instead of delegating to the model. We have access to the URL helper methods here so we can use article_url to get the article’s URL. We pass this object which represents the model that the serializer is focussed on.
/app/serializers/article_serializer.rb
class ArticleSerializer < ActiveModel::Serializer
  attributes :id, :name, :content, :url
  def url
    article_url(object)
  end
end
Being able to customize attributes through methods makes this serializer easy to use. Another useful feature is its support for associations. To include data from an article’s comments we just use has_many and pass it the name of the association.
/app/serializers/article_serializer.rb
class ArticleSerializer < ActiveModel::Serializer
  attributes :id, :name, :content, :url
  has_many :comments
  def url
    article_url(object)
  end
end
When we reload the page now we’ll see that the JSON includes the data for the associated comments.
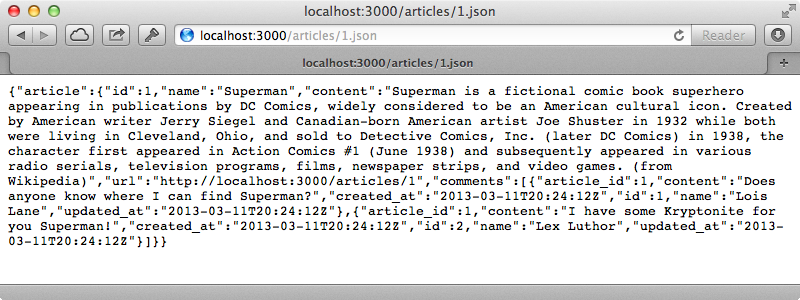
As you might expect we can customize the comments’ attributes by generating another serializer, so we’ll do that now.
$ rails g serializer comment
We’ll keep this one simple and just include the id and content attributes.
/app/serializers/comment_serializer.rb
class CommentSerializer < ActiveModel::Serializer
  attributes :id, :content
end
This behaviour, where if a serializer isn’t found the controller falls back to the default Rails serialization is really useful as it means that we can add serializers only when we need custom behaviour.
So far our comments data has been nested within the root article node. If we want it to be up at the root level we can do so and some JavaScript client-side frameworks do perform better if the data is like this. We can do this by changing our ArticleSerializer and adding a call to embed, specifying ids so that any associations will have just their include: true then the comments’ data is also included at the root level.
/app/serializers/article_serializer.rb
embed :ids, include: true
When we reload the page now the comments data is included at the top, outside the article root node. The article’s data now has a comment_ids attribute which includes the ids of the associated comments. This way we can keep our comments data separate and only include it as needed, although this depends on how we want the API to be consumed.

Conditional Attributes
If there are attributes that we want to include conditionally we can do so. Let’s say that we want to include an edit_url but only if the current user is an admin. We can’t really do this through attributes but we can override the attributes method and any hash returned will be converted and added to the JSON output.
/app/serializers/article_serializer.rb
def attributes
  data = super
  data[:edit_url] = edit_article_url(object)
  data
end
We want to keep the current behaviour so we first call super to get the data hash. We can then modify this and return it. We’ve added an edit_url attribute and set it to the article’s URL and while we haven’t yet made this conditional we’ll try it to see if it works.
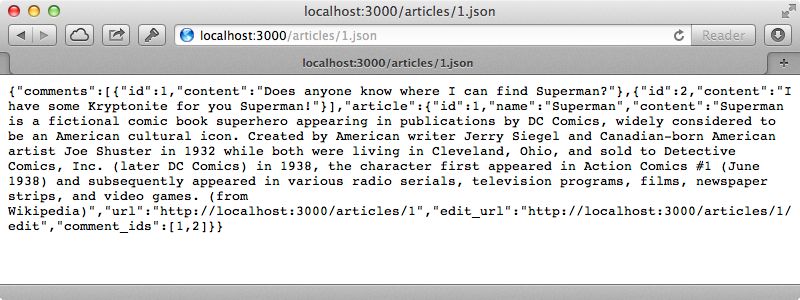
It does: the edit_url attribute is now displayed in the output. Next we’ll make this attribute conditional and only display it if the current user is an admin. The serializer is outside the controller and view layers so we can’t simply get the current_user here. To get around this problem there’s an object that’s passed in to every serializer called scope which defaults to the current user object.
/app/serializers/article_serializer.rb
def attributes
  data = super
  data[:edit_url] = edit_article_url(object) if scope.admin?
  data
end
If we try using this to make the edit_url attribute conditional, though, we get an exception when the page is reloaded saying that there’s an undefined admin? method on the scope object. This means that the scope object isn’t set to the current user and the issue is how we have the current_user method defined in our ApplicationController.
/app/controllers/application_controller.rb
private
def current_user
  OpenStruct.new(admin?: false)
end
helper_method :current_user
For now this simply stubs out a current_user object using OpenStruct which is a handy way to quickly add fake authentication when we’re developing an application. This method is marked as private which prevents the serializer from detecting it. If we make it protected instead this will now work and the edit_url is no longer displayed as our fake user isn’t an admin.
Our serializer is now working well but we have some issues with how the scope works. One problem is that it loads the current user record every time it makes a JSON request in our application, even if the user record isn’t accessed in the serializer. This can result in unnecessary database queries and potential performance issues. Another issue is that the name scope is rather generic and it’s not really obvious that the admin? method is called on the current user when we call it on scope. It would be much better if we could call current_user directly in our serializer. To get this to work we can customize the scope object that’s passed in to our serializers by changing the ApplicationController, calling serialization_scope and telling it to use something other than the current user, such as a view_context.
/app/controllers/application_controller.rb
serialization_scope :view_context
We can now call the current user through this view context and any other helper methods that we might need to access within our serializer. We’ll go back to our serializer and tell it to delegate the current_user method to the scope and then call admin? on that.
/app/serializers/article_serializer.rb
delegate :current_user, to: :scope
def attributes
  data = super
  data[:edit_url] = edit_article_url(object) if current_user.admin?
  data
end
Our page now has the same functionality as it did before but the current user is only loaded in as needed. One downside of this approach is that it can make testing a little more difficult as we need to provide access to the entire view context for the serializer. To get around this we can test it in a similar way to how we test helper methods by inheriting from ActionView::TestCase. This will automatically set up the view context for us so that we can pass it into the serializer.
Generating JSON Outside JSON Requests
We’ll finish this episode with one last tip. What do we do if we want to generate this JSON data outside a JSON request? For example lets say that we want to embed the JSON data for the articles on the index page. We could do this in a data attribute on one on the page’s elements. This can be a little complicated to do so we’ll create a helper method to create the attribute’s content.
/app/views/articles/index.html.erb
The helper method to generate the data will look like this:
/app/helpers/application_helper.rb
module ApplicationHelper def json_for(target, options = {}) options[:scope] ||= self options[:url_options] ||= url_options target.active_model_serializer.new(target, options).to_json end endThis method accepts a target object, which can be an ActiveRecord relation or a model. It first sets the
:scopeoption for the serializer toself, which is the view context and a:url_optionswhich it is important to pass in so that we don’t get any errors out host option being undefined. Finally we callactive_model_serializeron the object that’s being passed in. This is a method that the gem adds to relations and models so that we can determine what serializer it should use. We then create an instance of this serializer, passing in the options, and convert it to JSON.If we reload the page now and view the source we’ll see the articles’ data in the
data-articlesattribute.html
data-articles="[{"id":1,"name":"Superman"...That wraps up our episode on ActiveModel Serializers. It’s also worth taking a look at episodes 320 and 322 which cover JBuilder and RABL. These generate JSON in a different way by utilizing view templates instead of serializer objects. There are benefits to both approaches and while the object-orientated nature of Active Model Serializers may suit in some scenarios having the serialization done in the view layer may be a better approach at other times.
