
198: Edit Multiple Individually
(view original Railscast)
Other translations:


In episode 165 [watch, read], we created an application that could edit multiple records simultaneously. Each record on the index page had a checkbox against it so that we could choose which items we wanted to edit and then update the fields for those items.
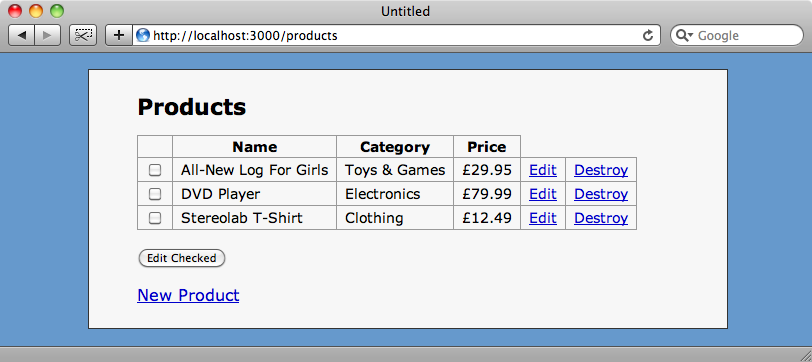
If we select the three products above then click “edit checked” we can then update the category, name or price for those products, for example putting them all into the “groceries” category.
The obvious restriction is that any changes we make are applied to all of the checked products, so in this episode we’ll write a similar application that will show a separate set of fields for each checked product so that we can update multiple products on a single form, each with their own set of values.
Adding The Checkboxes
We’ll start with a basic scaffolding for listing products. The scaffolding code gives us the ability to edit products individually, but of course that’s not what we want to do. As we did last time we’re going to add a checkbox against each item so that we can choose the items we want to edit. The first change we’re going to make therefore will be to the products index view.
/app/views/products/index.html.erb
<h1>Products</h1>
<% form_tag edit_individual_products_path do %>
  <table>
    <thead>
      <tr>
        <th></th>
        <th> </th>
        <th>Name</th>
        <th>Category</th>
        <th>Price</th>
      </tr>
    </thead>
    <tbody>
      <% for product in @products %>
      <tr>
        <td><%= check_box_tag "product_ids[]", product.id %></td>
        <td><%= product.name %></td>
        <td><%= product.category.name %></td>
        <td><%= number_to_currency product.price, :unit => "£" %></td>
        <td><%= link_to "Edit", edit_product_path(product) %></td>
        <td><%= link_to "Destroy", product_path(product), :confirm => "Are you sure?", :method => :delete %></td>
      </tr>
      <% end %>
    </tbody>
  </table>
  <p><%= submit_tag "Edit Checked" %></p>
<% end %>
<p><%= link_to "New Product", new_product_path %></p>
To add the checkboxes we have made a number of changes to the scaffolded code. Firstly we’ve wrapped the table in a form using form_tag.
<% form_tag edit_individual_products_path do %>
  <!-- table -->
<% end %>
The form will be submitted to a new action in the products controller called edit_individual that we’ll write shortly. In the table itself we’ll add a new th element in the header then, in the table’s body, a new cell to hold the checkbox, which we’ll declare with
<%= check_box_tag "product_ids[]", product.id %>
The name we pass to check_box_tag is product_ids[], the empty square brackets mean that we can pass multiple product ids as an array for all of the checked boxes. We also pass the product’s id as a value for each checkbox.
Finally we add a submit tag so that we can submit the form.
<%= submit_tag "Edit Checked" %>
The form submits to new action called edit_individual so the next thing we’ll need to do is write that action in the products controller, along with another one called update_individual that the edit_individual action will submit to when we update the selected products.
/app/controllers/products_controller.rb
def edit_individual
end
def update_individual
end
As we’re adding actions to a RESTful resource we’ll also need to make a change to the routes file.
/config/routes.rb
ActionController::Routing::Routes.draw do |map|
  map.resources :products, :collection => { :edit_individual => :post, :update_individual => :put }
  map.resources :categories
  map.root :products
end
We modify the products resource in routes.rb, adding a :collection argument with the two new actions. :edit_individual will be a POST request as we’re submitting to it through a form. We’re just fetching information so a GET request would be ideal but as we’re submitting multiple ids a POST is necessary. We’ll be updating records in :update_individual so this will be a PUT request.
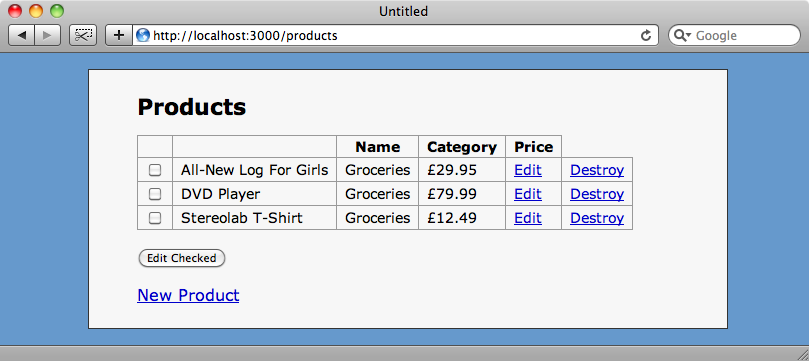
If we reload the index page now we’ll see checkboxes against each product and a button that we can click to edit those products.
We’ve not written the edit_individual template yet so we’ll see an error if we were to submit the form now. Before we create the template we’ll modify the edit_individual action so that it fetches all of the products with ids that match the array of product_ids from the checked checkboxes that are passed in.
/app/controllers/products_controller.rb
def edit_individual
  @products = Product.find(params[:product_ids])
end
Now on to the edit_individual view code. We give the page a title and then create a form, but should we use form_for or form_tag here? Well, form_for is meant to be used when editing a single model, but here we’re editing a number of models at once so we’ll use form_tag. We’ll pass it the URL to the update action and specify the method as PUT.
Inside the form we’ll loop through the list of products and use fields_for to generate the fields for each product. We do this by passing products[] and the product to fields_for. This will insert the product’s id into the empty square brackets so that each product is passed as a separate parameter. We’ll need to put the form fields themselves in next, but for now we’ll just print each product’s name. Finally we add a submit_tag.
/app/views/products/edit_individual.html.erb
<% title "Edit Products" %>
<% form_tag update_individual_products_path :method => :put do %>
  <% for product in @products %>
    <% fields_for "products[]", product do |f| %>
      <h2><%= h product.name %></h2>
    <% end %>
  <% end %>
  <p><%= submit_tag "Submit" %></p>
<% end %>
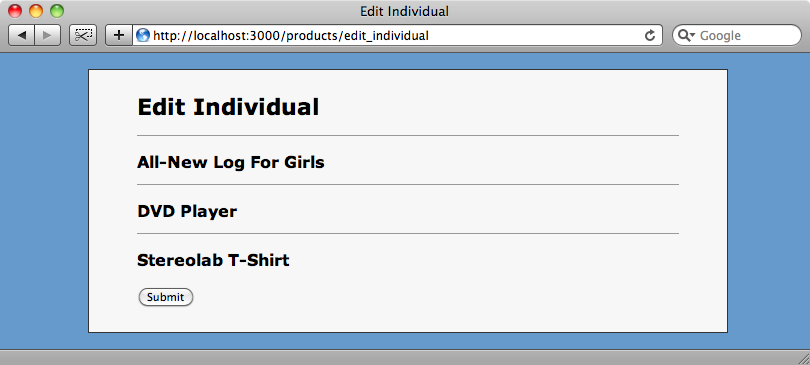
So, if we check the checkboxes for our three products and click “Edit Checked” we’ll be taken to the new edit_individual page and we’ll see the three products listed.
Along with the product’s name we want to show form fields for each product’s attributes. As these fields are also shown in the product’s new and edit actions the form itself is usually separated out into a partial. This partial contains a form_for tag which wraps the form elements for a product. We want to reuse the fields without the surrounding form_for so we’ll extract the fields into another partial that we can use both in the form and in the multiple edit page.
We’ll put the form fields into a new partial called _fields.html.erb.
/app/views/products/_fields.html.erb
<%= f.error_messages %>
<p>
    <%= f.label :name %>
    <%= f.text_field :name %>
</p>
<p>
  <%= f.label :price %>
  <%= f.text_field :price %>
</p>
<p>
  <%= f.label :category_id %>
  <%= f.collection_select :category_id, Category.all, :id, :name %>
</p>
<p>
  <%= f.check_box :discontinued %>
  <%= f.label :discontinued %>
</p>
We can then call this new partial from the _form partial, passing in the f variable.
/app/views/products/_form.html.erb
<% form_for @product do |f| %>
<%= render :partial => 'fields', :f => f %>
<p><%= form.submit "Submit" %></p>
<% end %>
Back in the edit_individual view code we can call this partial so that the fields for each product will be rendered.
/app/views/products/edit_individual.html.erb
<% content_for :title do %>
  Edit Individual
<% end %>
<% form_tag update_individual_products_path, :method => :put do %>
  <% for product in @products %>
    <% fields_for "products[]", product do |f| %>
      <h2><%= h product.name %></h2>
      <%= render "fields", :f => f %>
    <% end %>
  <% end %>
  <p><%= submit_tag "Submit" %></p>
<% end %>
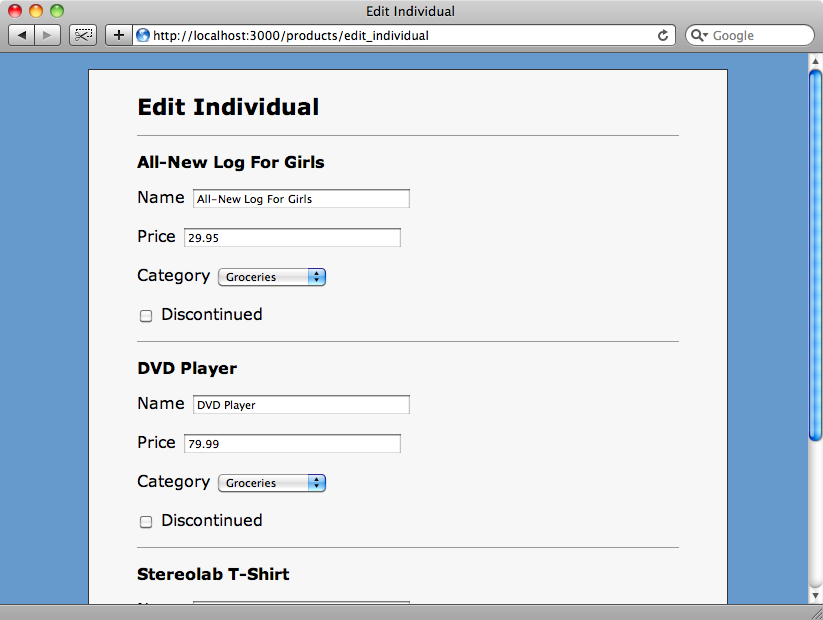
When we reload the page now we’ll see the form fields for each of the selected products with their values filled in.
If we look at the appropriate part of the page’s source code we can see that the form fields have interesting names. Each name begins with products then has the product’s id and its field name in square brackets. This means that the products’ values will be sent as a hash.
<p>
  <label for="products_3_name">Name</label>
  <input id="products_3_name" name="products[3][name]" size="30" type="text" value="Stereolab T-Shirt" />
</p>
<p>
  <label for="products_3_price">Price</label>
  <input id="products_3_price" name="products[3][price]" size="30" type="text" value="12.49" />
</p>
We can use that products parameter in the update_individual action to update all of the products when the form is submitted. We need to update multiple products simultaneously and there’s an ActiveRecord method called update that will do just that for us. update takes two arguments: the first one is either a single id or an array of ids and the second is a hash of values. To update our products we can pass in the keys and values from our products parameter. After updating the products we’ll create a flash message and then redirect to the products index page.
/app/controllers/products_controller.rb
def update_individual
  Product.update(params[:products].keys, params[:products].values)
  flash[:notice] = "Products updated"
  redirect_to products_url
end
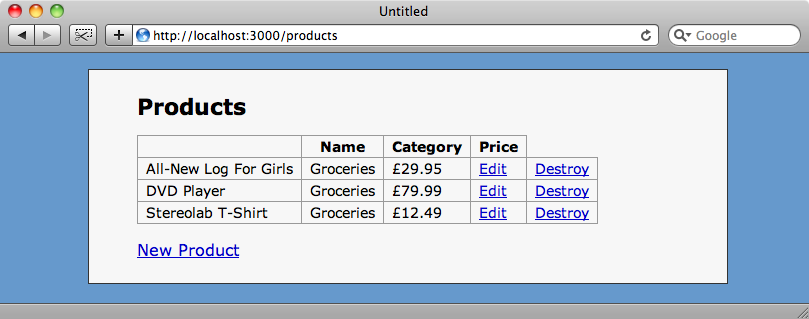
All of our products are currently in the “Groceries” category which is clearly wrong. We’ll change the categories of the t-shirt and DVD player and reduce their prices a little and submit the form. When we do we’ll be directed to the index page where we can see the updated products.

This means that our form works as we want it to and we can update a number of products at once.
Validations
If someone tries to enter invalid values on the new form we want to display any errors in a useful way. The Product model currently doesn’t have any validations so we’ll add one to ensure that the price is numeric.
/app/models/product.rb
class Product < ActiveRecord::Base
  belongs_to :category
  validates_numericality_of :price
end
In the products controller we now need to handle validation in the update_individual action. The update method will ignore validation errors and will move on to the next record if it comes across an invalid one. All is not lost, however, as update will return an array of all of the products that it tried to update and we can use that to determine which products were invalid.
One way to get the invalid products would be to use the reject method on the array and, in reject’s block, call valid? on each product to filter out the valid ones.
Product.update(params[:products].keys, params[:products].values).reject { |p| p.valid? }
The problem with this approach is that it will run the validation for each product again. A more efficient way to do this would be to reject the products with an empty errors array. We’ll assign this array of invalid products to a variable and check to see if it’s empty. If it is we’ll redirect to the index page as before, otherwise we’ll re-render the edit_individual form to show the errors for those invalid products.
/app/controllers/products_controller.rb
def update_individual
  @products = Product.update(params[:products].keys, params[:products].values).reject { |p| p.errors.empty? }
  if @products.empty?
    flash[:notice] = "Products updated"
    redirect_to products_url
  else
    render :action => 'edit_individual'
  end
end
If we try to edit the t-shirt and DVD player again but set an invalid value for the DVD player’s price we’ll now be returned to the edit page and shown the form again but with just the DVD player on it this time and with the validation error shown.
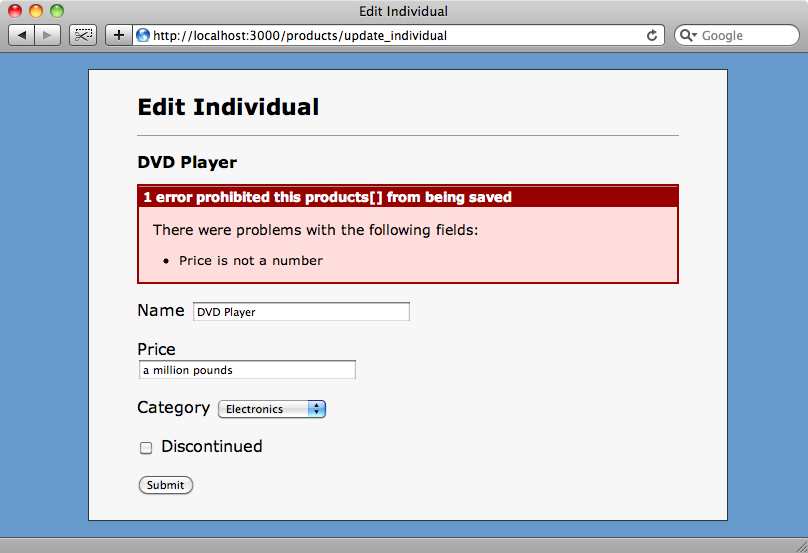
The title of the error message panel is currently showing the name as “products[]”, but this is easy to fix. The error messages are generated in the fields partial using the error_messages method. This takes an :object_name parameter that we can use to set the name that will be displayed.
/app/views/products/_fields.html.erb
<%= f.error_messages :object_name => "product" %>
With that done the error message will now say “product” instead of “products[]”.
One More Thing
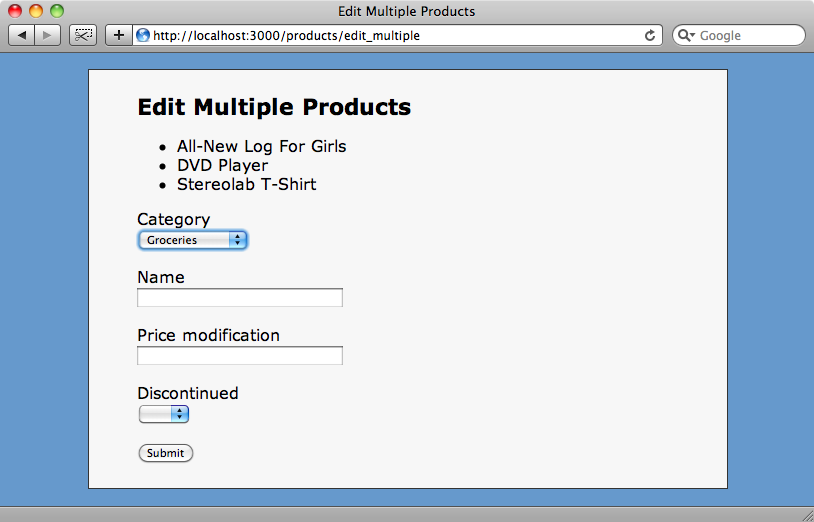
The functionality we were after is now pretty much complete, but to finish off this episode we’ll add one more thing to make the application more useful. If we want to change a single attribute on a number of products, for example to update the price, the edit form will become cumbersome. What we’re going to do is allow the users to select a single attribute from a list so that they can then update one attribute on a number of products without having to navigate through a long form.
To do this we’ll add a pop-up menu next to the “edit checked” button on the products index page that will allow us to choose which field to edit. We can do that by adding the following line immediately before the submit_tag in the products index view.
/app/views/products/index.html.erb
<p><%= select_tag :field, options_for_select([["All Fields", ""], ["Name", "name"], ["Price", "price"], ["Category", "category_id"], ["Discontinued", "discontinued"]])%></p>
Now we’ll be able to choose to edit all of the fields or just a single field for each selected product. To restrict the fields that are shown we’ll have to update the fields partial so that only the selected field is shown.
/app/views/products/_fields.html.erb
<%= f.error_messages, :object_name => "product" %>
<% if params[:field].blank? || params[:field] == "name" %>
<p>
    <%= f.label :name %>
    <%= f.text_field :name %>
</p>
<% end %>
<% if params[:field].blank? || params[:field] == "price" %>
<p>
  <%= f.label :price %>
  <%= f.text_field :price %>
</p>
<% end %>
<% if params[:field].blank? || params[:field] == "category_id" %>
<p>
  <%= f.label :category_id %>
  <%= f.collection_select :category_id, Category.all, :id, :name %>
</p>
<% end %>
<% if params[:field].blank? || params[:field] == "discontinued" %>
<p>
  <%= f.check_box :discontinued %>
  <%= f.label :discontinued %>
</p>
<% end %>
What we’ve done above is alter the partial so that it reads the :field attribute from the new pop-up menu on the index form and only shows each field if the attribute is blank (i.e. if the user has selected “All Fields”) or matches the name of the field. This isn’t the tidiest code there is and could be cleaned up by making use of Formtastic but it will work for us for now.
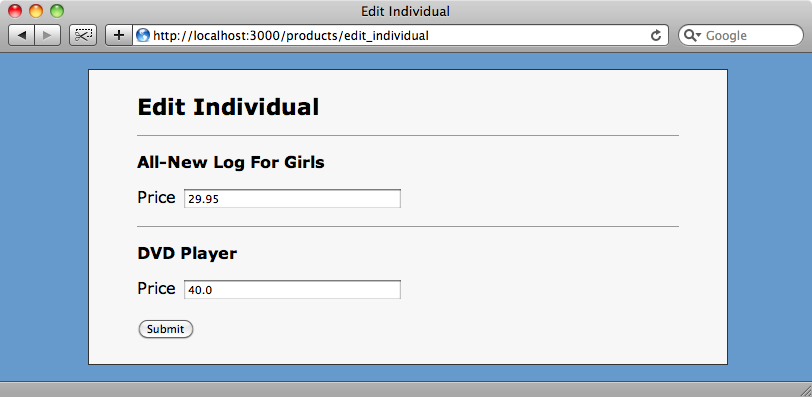
If we select two of the products from the index page now and choose “price” from the pop-up menu then the edit form will just display the price fields for those two products.
And that’s it for this episode. Editing multiple records in a single form is fairly straightforward if you make the right use of fields_for and this is a useful technique that can be applied in a number of situations.