
260: Messaging With Faye
(view original Railscast)
Other translations:


In this episode we’re going to add a simple Instant Messaging feature to an existing Rails application. We’ve already implemented some of the functionality and have a page with a text field that we can type a message into. The message is then added to the chat window via JavaScript and AJAX when we click ‘send’.
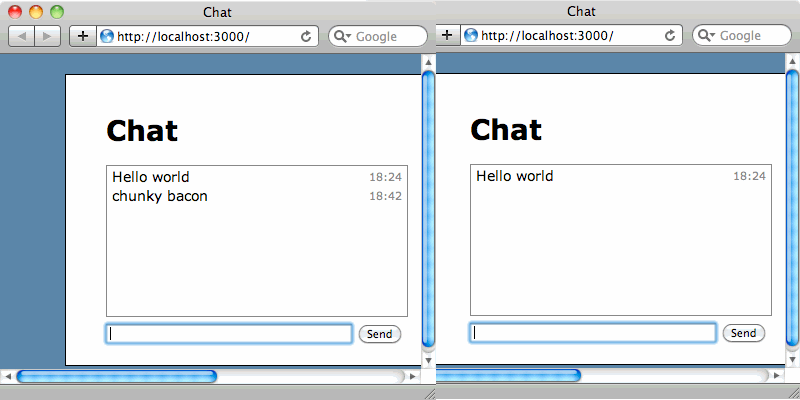
So far, so good, but as it stands our application has a problem. If we open up another window or browser to act as another chat client the messages typed into one window won’t appear in the other.
What we need are push notifications to tell all the others clients that a new message has been added and display it. There are several ways that we could implement this but before we do we’ll take a look at the code we have so far, which is a simple form that uses AJAX and jQuery. There’s nothing complex here but if you’re unfamiliar with jQuery then it’s worth taking a look at episode 136 [watch, read] before reading any further.
Firstly, as we’re using jQuery in this application, we’ve added the jquery-rails gem to the Gemfile.
/Gemfile
source 'http://rubygems.org'
gem 'rails', '3.0.5'
gem 'sqlite3'
gem 'nifty-generators'
gem 'jquery-rails'
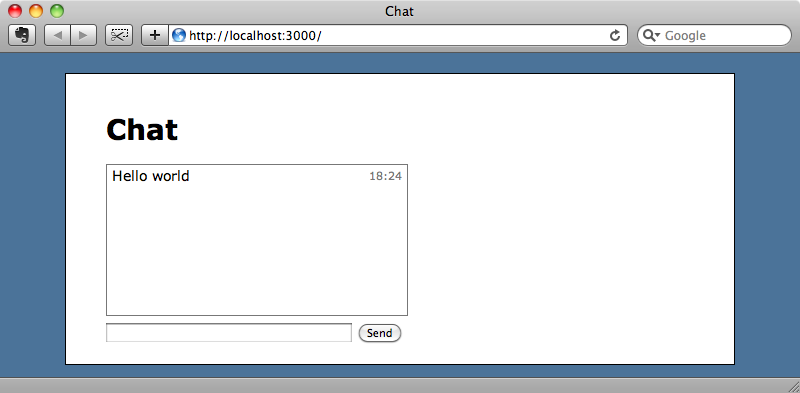
Next we’ll look at the view code for the chat page. This has a list with an id of chat that lists the messages and a form that uses :remote => true so that it will be submitted via AJAX.
/app/views/messages/index.html.erb
<% title "Chat" %>
<ul id="chat">
  <%= render @messages %>
</ul>
<%= form_for Message.new, :remote => true do |f| %>
  <%= f.text_field :content %>
  <%= f.submit "Send" %>
<% end %>
The form is submitted to the MessagesController’s create action.
/app/controllers/messages_controller.rb
class MessagesController < ApplicationController
  def index
    @messages = Message.all
  end
  def create
    @message = Message.create!(params[:message])
  end
end
The create action has a JavaScript template which appends the new message to the list and resets the form.
/app/views/messages/create.js.erb
$("#chat").append("<%= escape_javascript render(@message) %>");
$("#new_message")[0].reset();
This is all fairly straightforward JavaScript code. What we need to do is change the first line in the code above so that the new message is broadcast to all of the clients.
How should we go about this? The truth is that Rails isn’t very good at handling asynchronous events as we can’t keep a socket open to a Rails application. We could consider switching web frameworks completely and there are many others that are designed to handle this kind of problem. Frameworks such as Node.js with Socket.IO, or, if you want to stick with Ruby, Cramp, async_sinatra, or the new Goliath framework are all great solutions but what if we want to stick with Rails? It would be nice if we could continue to use Rails for our application’s logic and have the benefits of some kind of asynchronous event handling with publishing and subscribing when we need that.
This is where Faye comes in. Faye is a server that handles publishing and subscribing asynchronously. We can use it alongside our Rails application and call on it when we need that extra functionality. Faye has two variations: a Node.js server and a Ruby server. They both use the same protocol so we can choose the one for the language we’re most comfortable with. Needless to say we’ll choose the Ruby server.
To get Faye set up we first need to install the Faye gem.
$ gem install faye
Next we’ll need to create a Rackup file in the root of our Rails app which we’ll call faye.ru. In that file we’ll create a new Rack application using a line of code pasted from the Faye documentation, then run it.
/faye.ru
require 'faye'
faye_server = Faye::RackAdapter.new(:mount => '/faye', :timeout => 45)
run faye_server
We can start the server by running the rackup command. This is designed to work with the Thin server and in production mode and we’ll need to pass two options in to reflect this.
$ rackup faye.ru -s thin -E production
>> Thin web server (v1.2.11 codename Bat-Shit Crazy)
>> Maximum connections set to 1024
>> Listening on 0.0.0.0:9292, CTRL+C to stop
Our Faye application is now running on port 9292. The server has a JavaScript file that we’ll need to include in our application’s layout file. We’ll find this file at http://localhost:9292/faye.js, the name being based on the :mount option we supplied above.
/app/views/layouts/application.html.erb
<%= javascript_include_tag :defaults, "http://localhost:9292/faye.js" %>
Obviously in production mode we’ll need to change the URL so that it points to the correct server.
The Faye site includes documentation on how to use it in a browser and it explains that once we’ve included Faye’s JavaScript file we need to create a new client. To do so we’ll need a add some code in our application.js file.
/public/javascripts/application.js
$(function() {
  var faye = new Faye.Client('http://localhost:9292/faye');
});
Note that we use the $ function to ensure that the code isn’t run until the page’s DOM has loaded. Again, we’d need to change the URL when the application is in production mode.
Once we have a Faye client set up we can subscribe to channels. As we only have one page in our application we only need one channel and we’ll call it /messages/new. To subscribe to a channel we call the subscribe function, passing in the name of the channel and a callback function. The callback function will be fired when a message is received on the channel and it will have some data passed to it. For now we’ll just alert that data to see what’s returned.
/public/javascripts/application.js
$(function() {
  var faye = new Faye.Client('http://localhost:9292/faye');
  faye.subscribe('/messages/new', function (data) {
    alert(data);
  });
});
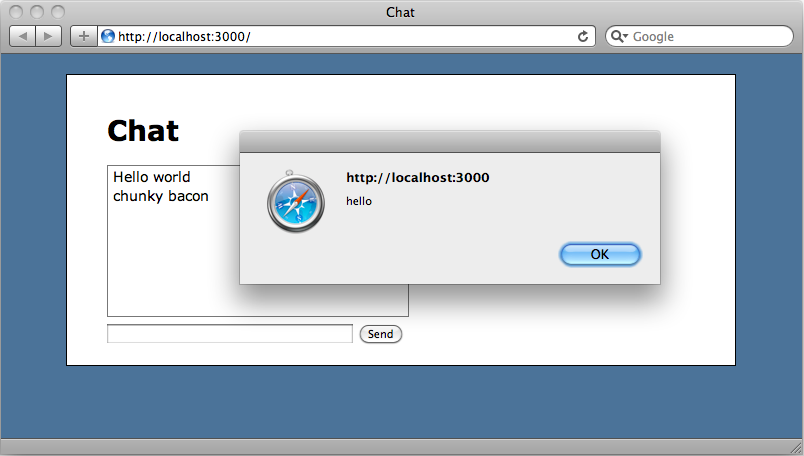
We can try this out now by starting up our Rails application and going to the chat page. The JavaScript is loaded and the Faye client will start listening for messages. We can trigger a callback manually by using curl to send a message to the channel.
$ curl http://localhost:9292/faye -d 'message={"channel":"/messages/new", "data":"hello"}'
We have to send POST data in a certain format for this to work: a message parameter with some JSON data. The JSON needs to include keys called channel and data.
When we run the curl command we instantly get an alert message in the browser containing the data that we sent.
This means that we can now send notifications through our Rails application by sending a POST request to Faye.
Broadcasting Messages
We can now think about modifying our create.js.erb file so that when a message is submitted it broadcasts a message via Faye to all of the subscribing browsers. It would be handy to have a method called, say, broadcast that would take a channel parameter and a block. Whatever is passed into the block could then be broadcast to the channel.
We’ll create this method in the ApplicationHelper. In it we build up a message from the channel parameter and the output from the block and then use Net::HTTP.post_form to POST that data to the Faye server.
/app/helpers/application_helper.rb
module ApplicationHelper
  def broadcast(channel, &block)
    message = {:channel => channel, :data => capture(&block)}
    uri = URI.parse("http://localhost:9292/faye")
    Net::HTTP.post_form(uri, :message => message.to_json)
  end
end
As we’re using Net::HTTP we’ll need to require it as it’s not included by default in Rails. We’ll do that in the /config/application.rb file.
/config/application.rb
require File.expand_path('../boot', __FILE__)
require 'rails/all'
require 'net/http'
# rest of file...
Now that we have our new broadcast method we can use it in create.js.erb.
/app/views/messages/create.js.erb
<% broadcast "/messages/new" do %>
$("#chat").append("<%= escape_javascript render(@message) %>");
<% end %>
$("#new_message")[0].reset();
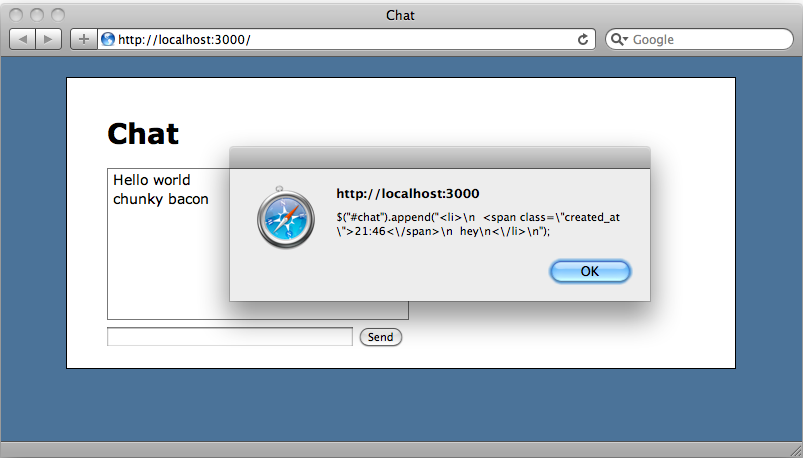
We can try this out now. If we go back to our application and enter a chat message it is broadcast back to us through Faye and we see the JavaScript that we’ll need to evaluate to add the new message to the list.
To get the browser to evaluate the JavaScript instead of showing it we simply need to change the alert to an eval.
/public/javascripts/application.js
$(function() {
  var faye = new Faye.Client('http://localhost:9292/faye');
  alert('subscribing!')
  faye.subscribe('/messages/new', function (data) {
    eval(data);
  });
});
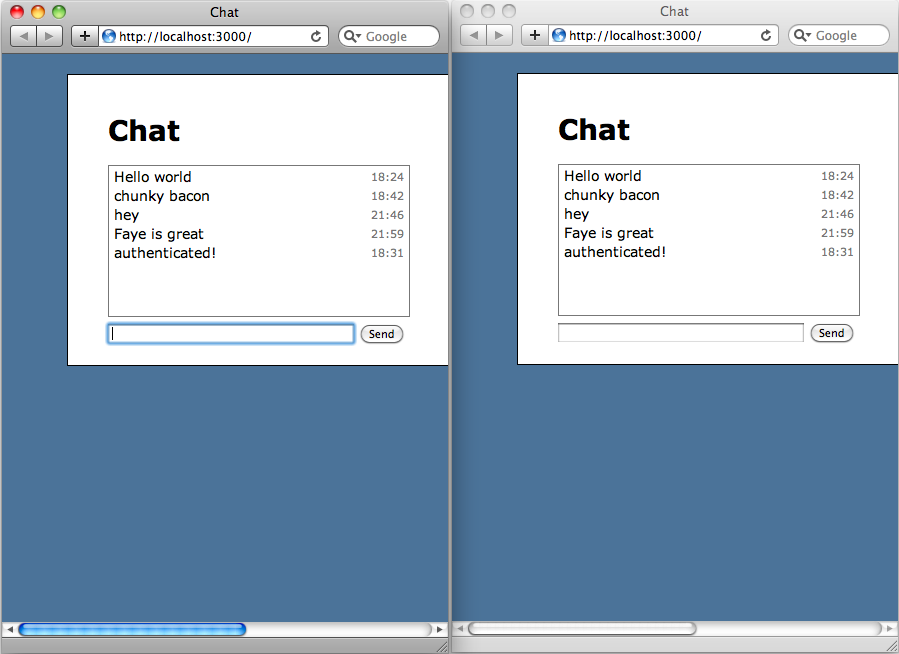
If we reload the page and then open another window we can test this functionality out. When we type a message into one chat window it is immediately shown in the other as well.

Now that this is set up we can take any AJAX request and broadcast any JavaScript to all of the subscribed clients by using the simple broadcast block. If we want to work with JSON instead of executing JavaScript on each client we can do so by using a similar approach that returns JSON instead of JavaScript to be evaluated.
Security
The code we’ve written so far works well but it isn’t secure. Earlier we broadcast a message by calling curl from the command line and as our code currently stands anyone could do the same and send JavaScript that will be evaluated on all of the clients that are listening to a given channel.
We can solve this through Faye by using extensions. These are explained in the documentation but we’ll run through them quickly here. To use them we have to create a Ruby class and have it implement either an incoming or outgoing method. Our method will read an authentication token and return an error if the token isn’t the expected one. We can then use Faye’s add_extension method to add the class as an extension to the Faye server in the Rackup file.
We’ll make a token that is shared between the Faye server and the Rails application and which will check that the token matches before any messages are accepted. To do this we’ll start by adding a new initalizer file to our Rails application that we’ll call faye_token.rb. Note that we don’t want to include this file in a Git repository as it needs to be unique for every system where we use this application. In the file we’ll create a constant called FAYE_TOKEN that can have any value.
/config/initializers/faye_token.rb
FAYE_TOKEN = "anything_here"
Next we’ll update the broadcast method so that it includes this token with any messages that are sent. Extension data should be included in an :ext parameter and in that parameter we send our token with the name :auth_token.
/app/helpers/application_helper.rb
module ApplicationHelper
  def broadcast(channel, &block)
    message = {:channel => channel, :data => capture(&block), :ext => {:auth_token => FAYE_TOKEN}}
    uri = URI.parse("http://localhost:9292/faye")
    Net::HTTP.post_form(uri, :message => message.to_json)
  end
end
Finally we need to modify the faye.ru file and add an extension for handling the authentication.
/faye.ru
require 'faye'
require File.expand_path('../config/initializers/faye_token.rb', __FILE__)
class ServerAuth
  def incoming(message, callback)
    if message['channel'] !~ %r{^/meta/}
      if message['ext']['auth_token'] != FAYE_TOKEN
        message['error'] = 'Invalid authentication token.'
      end
    end
    callback.call(message)
  end
end
faye_server = Faye::RackAdapter.new(:mount => '/faye', :timeout => 45)
faye_server.add_extension(ServerAuth.new)
run faye_server
We load the Faye token from the initalizer file we wrote before and then we create a new class called ServerAuth that has an incoming method. In that method we first ensure that the channel’s name doesn’t begin with “meta” as Faye uses names like that internally and we don’t want to authenticate any of these channels. Next we’ll check that the auth_token is correct and if it isn’t send an error message. Then we call the callback. This won’t allow messages that have an error clause in them. Finally, at the bottom of the file we add the extension method in immediately after creating the Faye server.
If we restart both servers now an try to submit the curl command again we get a Bad Request response as the request isn’t authenticated.
$ curl http://localhost:9292/faye -d 'message={"channel":"/messages/new", "data":"hello"}'
HTTP/1.1 400 Bad Request
Content-Type: application/json
Connection: close
Server: thin 1.2.11 codename Bat-Shit Crazy
Content-Length: 11
However our Rails application is still works as it should as it’s messages send the correct authentication token.
That’s it for this episode on using Faye. It’s an excellent solution for handling push notifications without having to change web frameworks entirely. We can keep all of the logic inside Rails and still enjoy the benefits of push notifications.
If you’re not interested in managing your own Faye server there’s a server called Pusher which is a solution that handles the event server for you and which is well worth taking a look at.