
271: Resque
(view original Railscast)
Other translations:


In this episode we’ll take a break from our series on the new features of Rails 3.1 and take a look at Resque which is a great way to handle background jobs in Rails applications. We’ve covered several ways of handling background processing in previous episodes; each one serves a slightly different need and Resque is no exception. At the end of this episode we’ll give you some tips on choosing the right one to fit your needs but for now, let’s dive into Resque and add it to a Rails application.
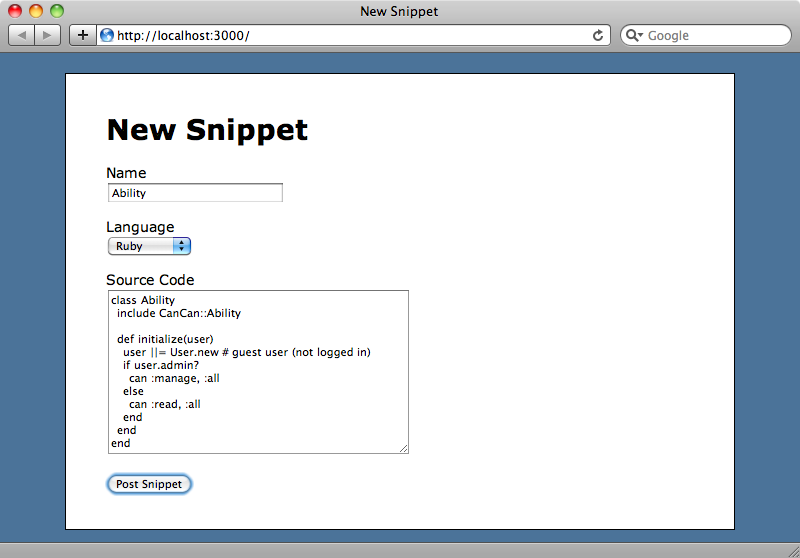
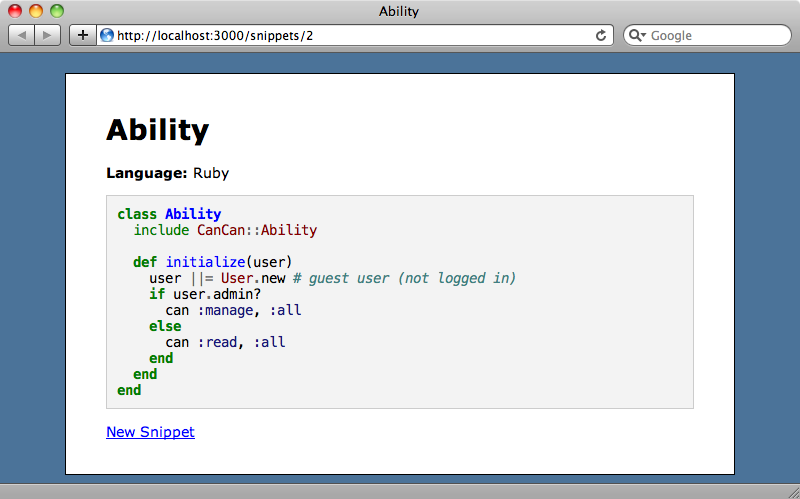
The application we’ll be using is a simple code-sharing snippet site a little like Pastie. With this site we can enter a code sample and give it a name and language.
When we submit a snippet it is shown with the appropriate syntax highlighting for the selected language applied.
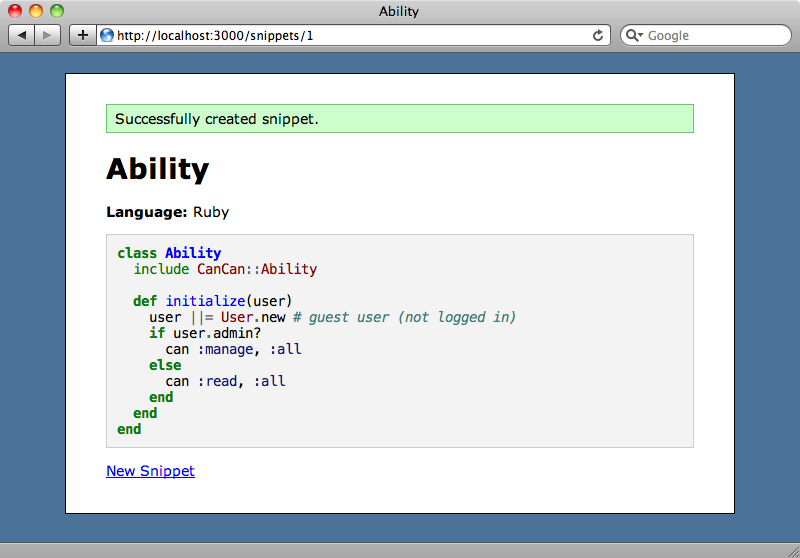
The syntax highlighting is handled by an external web service and it’s this part of the code that we want to be handled by a background job. It is currently executed inline as part of the SnippetController’s create action.
/app/controller/snippets_controller.rb
def create
  @snippet = Snippet.new(params[:snippet])
  if @snippet.save
    uri = URI.parse('http://pygments.appspot.com/')
    request = Net::HTTP.post_form(uri, {'lang' => ↵
      @snippet.language, 'code' => @snippet.plain_code})
    @snippet.update_attribute(:highlighted_code, request.body)
    redirect_to @snippet, :notice => "Successfully created ↵
      snippet."
  else
    render 'new'
  end
end
The syntax highlighting happens when the snippet is saved. It uses the service available at http://pygments.appspot.com/, which was set up by Trevor Turk, to provide highlighting without using a local dependency. The code makes a POST request to the service, sending the plain code and the language, and populates the snippet’s highlighted_code attribute with the response from that request.
Communicating with external services through a Rails request is generally a bad idea as they might be slow to reply and so tie up your entire Rails process and any other requests that trying to connect to it. It’s much better to move external requests out into an external process. We’ll set up Resque so that we can move the request into a Resque worker.
Getting Resque Running
Resque depends on Redis which is a persistent key-value store. Redis is fairly awesome in itself and well worth an episode on its own, but here we’re just going to use it with Resque.
As we’re running OS X the easiest way to get Redis installed is through Homebrew which we can do by running this command.
$ brew install redis
Once it has installed we can start up the server by running
$ redis-server /usr/local/etc/redis.conf
With Redis running we can add Resque to our application’s Gemfile and then install it by running bundle.
/Gemfile
source 'http://rubygems.org'
gem 'rails', '3.0.9'
gem 'sqlite3'
gem 'nifty-generators'
gem 'resque'
Next we have to add the Resque Rake tasks. We’ll do this by adding a resque.rake file in our application’s /lib/tasks directory. In this file we need to require "resque/tasks" so that the gem’s custom tasks are loaded. We’ll also load the Rails environment when the workers start.
/lib/tasks/resque.rake
require "resque/tasks"
task "resque:setup" => :environment
This gives us access to our application’s models in the workers. If we want to keep our workers light, however, it might be worth implementing a customized solution so that the entire Rails environment isn’t loaded.
We now have a Rake task that we can use to start up the Resque workers. To run it we need to pass in a QUEUE argument. We can either pass in the name of a specific queue that we want to work on or '*' to work on any queue.
$ rake resque:work QUEUE='*'
This script won’t show any output but it is working.
Moving The Web Service Code
Now that we have Resque set up we can focus on moving the code that calls the web service into a background process and handling it through a worker. We need to add a job to the queue so that the work is handled by a Resque worker. Here’s the create action again.
/app/controller/snippets_controller.rb
def create
  @snippet = Snippet.new(params[:snippet])
  if @snippet.save
    uri = URI.parse('http://pygments.appspot.com/')
    request = Net::HTTP.post_form(uri, {'lang' => ↵
      @snippet.language, 'code' => @snippet.plain_code})
    @snippet.update_attribute(:highlighted_code, request.body)
    redirect_to @snippet, :notice => "Successfully created ↵
      snippet."
  else
    render 'new'
  end
end
We add a job to the queue by calling Resque.enqueue. This method takes a number of arguments, the first of which is the class of the worker that we want to use to handle the job. We haven’t created any workers but we’ll create one shortly and call it SnippetHighlighter. We also need to pass any additional arguments that we want to pass to the worker. In this case we could pass in the snippet but whatever we pass in to enqueue is converted to JSON so that it can be stored in the Redis database. This means that we shouldn’t pass complex objects like ActiveRecord models into here so instead of passing the whole snippet we’ll pass it’s id and refetch the snippet in the worker.
/app/controllers/snippets_controller.rb
def create
  @snippet = Snippet.new(params[:snippet])
  if @snippet.save
    Resque.enqueue(SnippetHighlighter, @snippet.id)
    redirect_to @snippet, :notice => "Successfully created ↵
      snippet."
  else
    render 'new'
  end
end
Next we’ll create the worker and move the code that we’ve taken from the controller into it. We’ll put the worker in a new workers directory under /app. We could put this class under the /lib directory but by having it in /app it’s automatically loaded and already in Rails’ loadpath.
A worker is just a class with two features. Firstly it needs an instance variable called @queue that holds the name of the queue. This limits the queues that the worker handles. Secondly it needs a class method called perform that takes the arguments that we passed to enqueue, in this case the snippet’s id. In this method we can put the code we extracted from the create action that calls the remote server and returns the highlighted code, replacing the calls to the @snippet_id instance variable with the local variable with the same name.
/app/workers/snippet_highlighter.rb
class SnippetHighlighter
  @queue = :snippets_queue
  def self.perform(snippet_id)
    snippet = Snippet.find(snippet_id)
    uri = URI.parse('http://pygments.appspot.com/')
    request = Net::HTTP.post_form(uri, {'lang' => ↵
      snippet.language, 'code' => snippet.plain_code})
    snippet.update_attribute(:highlighted_code, request.body)
  end
end
Let’s try this out and see if it works. We’ll create a new snippet and submit it. When we do and we’ll see the snippet without any highlighting.
We won’t see the highlighting straightaway as it’s now done in the background. If we wait a few seconds and reload the page it’s still not applied so let’s try debugging the code to see what’s not working. Resque comes with a web interface, written in Sinatra. This makes is easy to monitor and manage its jobs. We can start it up by running
$ resque-web
When we run this the admin interface opens and we’ll see that we have a failed job.
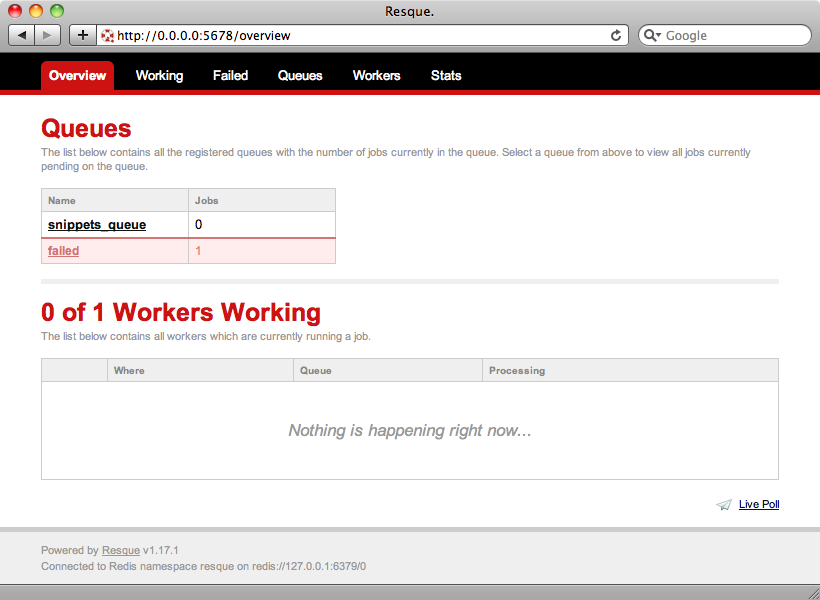
If we click on the failed job we’ll see the details of the error: uninitialized constant SnippetHighlighter.
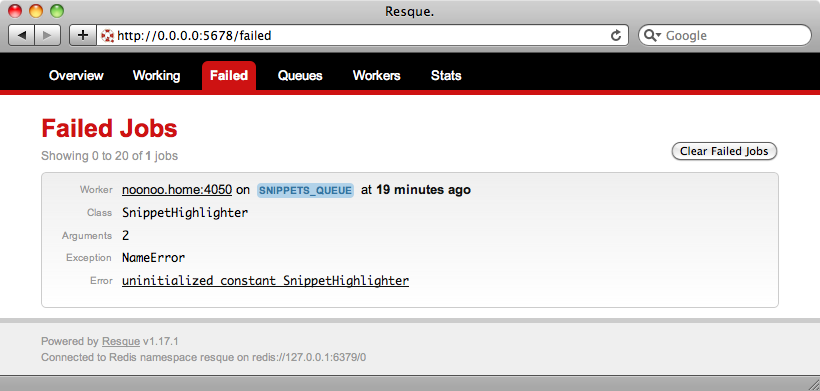
The SnippetHighlighter class isn’t being found and the reason for this is that we started the Rake task before we wrote it. Let’s restart it and see if it fixes the issue.
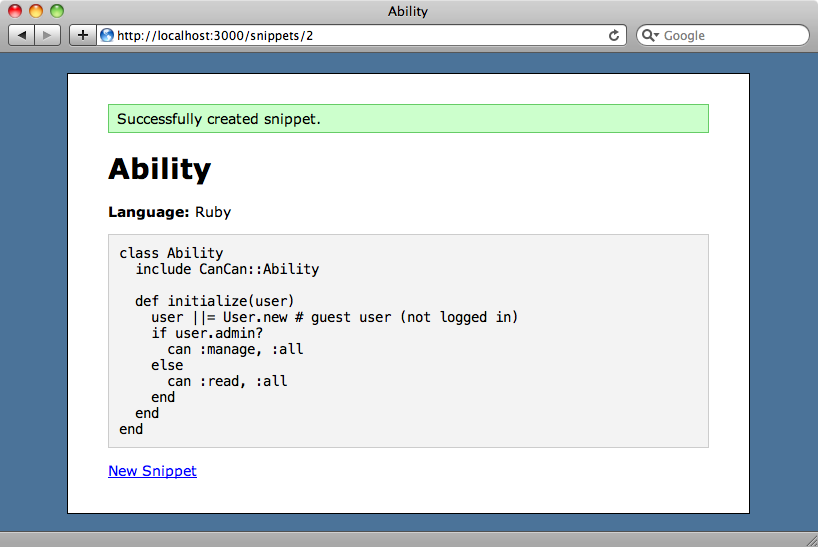
Once we’ve restarted the Rake task we can click the ‘Retry’ link to run the job again. When we do and we go back to the ‘Overview’ page there is still only one failed task listed so it appears that the job has run successfully this time. We can confirm this by reloading the last snippet we uploaded. This time the code is highlighted which means that the background job has run successfully.
If we upload a new snippet now it will be syntax-highlighted, though there may be a few seconds’ delay before the highlighting appears.
Embedding The Resque Web Interface
We now have Resque all set up and handling the jobs we give it. It would be useful though if we could embed Resque’s web interface into our Rails application so that we don’t have to start it up and manage another separate process.
Rails 3 works well with Rack applications and Sinatra is just another Rack application so it’s easy to do this by just mounting the application in the routes file.
/config/routes.rb
Coderbits::Application.routes.draw do
  resources :snippets
  root :to => "snippets#new"
  mount Resque::Server, :at => "/resque"
end
The Resque web interface will now be mounted in our Rails application at http://localhost:3000/resque. We need to make sure that the Resque server is loaded for this to work and so inside the Gemfile we’ll add a require option to the resque gem.
/Gemfile
source 'http://rubygems.org'
gem 'rails', '3.0.9'
gem 'sqlite3'
gem 'nifty-generators'
gem 'resque', :require => 'resque/server'
If we restart our application’s server now and visit http://localhost:3000/resque we’ll see Resque’s web interface.

We don’t want this page to be publicly visible. How can we add some authorization to it to keep prying eyes out? If we were using something like Devise in our application it would be easy to secure this by wrapping the route in a call to authenticate.
/config/routes.rb
Coderbits::Application.routes.draw do
  resources :snippets
  root :to => "snippets#new"
  authenticate :admin do
    mount Resque::Server, :at => "/resque"
  end
end
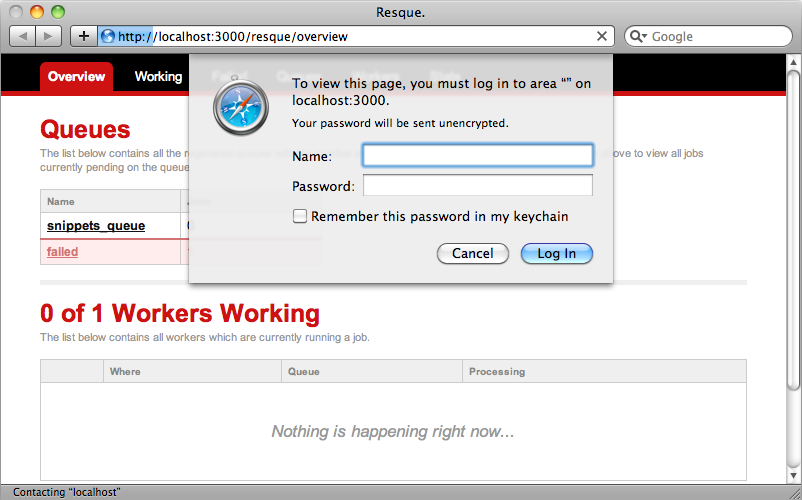
We’re not using Devise or any other authentication system in our application so instead we’ll use HTTP Basic Authentication. To do this we’ll create a new initializer in the config/initializers directory called resque_auth.rb.
/config/initializers/resque_auth.rb
Resque::Server.use(Rack::Auth::Basic) do |user, password|
  password == "secret"
end
In this file we call use on Resque::Server, which is a Rack app, and add the Basic Authentication. In the block we check that the password matches. Obviously we can customize this code to set any username or password and add any other logic we want in here. When we restart the server and reload the page we’ll see the login prompt and we’ll need to enter the password we specified in the initializer to view the page.
Resque and its Alternatives
That’s it for our coverage of Resque. How do we choose between this and the other background processing tools available to us? One of the benefits of Resque is the admin interface that lets us monitor the queue, retry failed jobs and so on. Another reason to consider Resque is that Github uses it. Github handles a heavy load and so it should be able to handle anything we can throw at it.
If the Redis dependency is a problem then Delayed Job is a great alternative. This was covered in episode 171 [watch, read] and is an easier solution as it uses our application’s database to manage the job queue. It does, however, load the application’s Rails environment for all the workers. If we want to keep our workers light then this may not be the best solution.
Both Resque and Delayed Job use polling on the queue so there might be a slight delay between a job being added to the queue and when it’s processed. If the queue is often empty and we want jobs to be processed straightway then Beanstalkd, covered in episode 243 [watch, read], is the better option. Beanstalkd handles jobs through a push event so it can begin processing a job that’s added to the queue immediately.